
DDRtists
ɹoʇɐɹǝpoɯ ɹǝdns
- Reaction score
- 415
Basic Guide to the Setup and Use of MySQL
Written by DDRtists for TheHelper.net
Written by DDRtists for TheHelper.net
Software URL: http://mysql.com/
This guide is for WIN32 Setup. Setup on Linux and other OS's is different, and a bit harder.
What is MySQL?
MySQL, in short, is a database system/server that makes it easy to store data sent to it by a Server SSI such as PHP, or applications. It is free for personal use, but you must pay for corprate use.
What will I get out of this Tutorial?
After reading this tutorial, you should be able to install MySQL, and connect to it via PHP. You should also know some basic query strings.
Step 1 - Download:
You are going to want the "Community Server" from here: http://dev.mysql.com/downloads/mysql/5.0.html#downloads . At the time of writing this, the current version is "5.0". You are going to want the one labeled "Windows", as "Windows x64" is for Vista, and is not covered in this guide. It may be the same, but I have no way to test it, sorry.
The package you want is "Windows (x86) ZIP/Setup.EXE". Pick a mirror and download. Might want to go get some food or a drink, it may take awhile to download.
Step 2 - Install:
After you download the file, Unzip it and run "Setup.exe". You should see this:
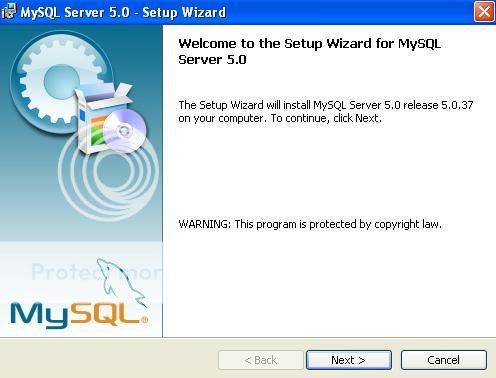
If so, click "Next >". If not, you have problems.

After you click next, you should see this window:
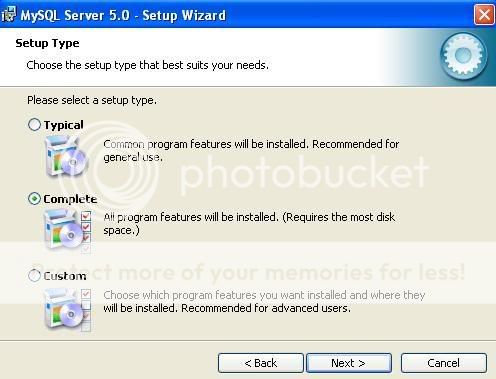
While you can select "Typical", I would recommend selecting "Complete" as the type of install. If you are installing for a certain program that requires special settings, select "Custom" ( This is not covered in this tutorial, yet.
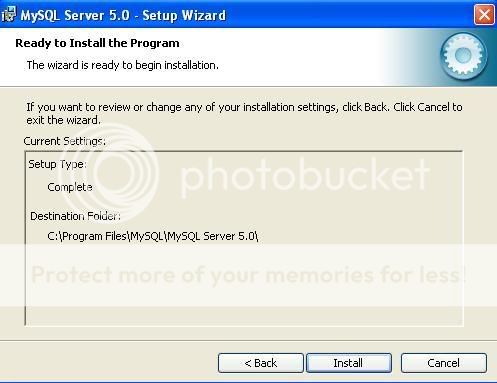
).After you select what you want, click "Next >". You will be prompted with information. Make sure it is correct, and then hit "Install".
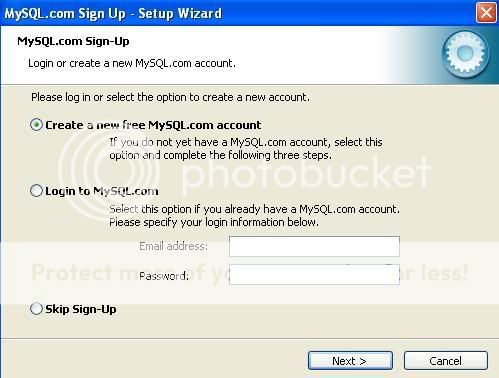
You will then be prompted to make a MySQL.com Account. I would just hit "Skip Sign-Up", but you may make one if you'd like.
After you pass this stage, a Window will come up, with a checkbox that says "Configure the MySQL Server now!". Make sure this is checked, and click "Finish".
Step 3 - Configure:
After the "MySQL Server Instance Configuration Wizard" Loads, you will see this box:

Click "Next >" and you will see this:
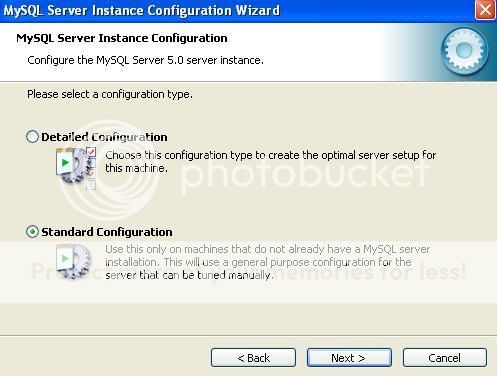
Once again, if you are just installing it for general purposes ( PHP, Web Stuff ), "Standard Configuration" most times will suit just fine. "Detailed Configuration" is only needed for applications with Special needs, for the most part. Click "Next >".
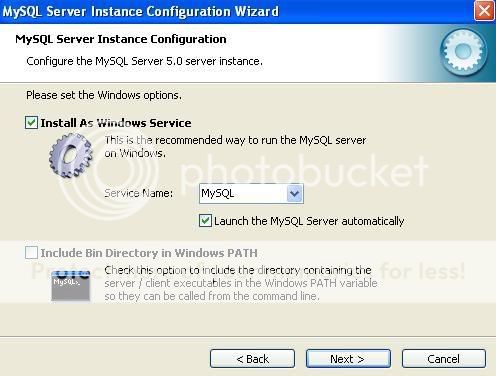
On this screen, it may look scary but it's pretty easy.
Install as Windows Service: You want this on.
Service Name: You can leave this alone, as long as you only have 1 install of MySQL on this computer.
Launch the MySQL Server Automatically: Check if you want MySQL to start automatically on startup.
Include Bin Directory in Windows PATH: Only check this if you are not planning on using a MySQL GUI Program, and plan to do everything by Command Prompt.
I would recommend The Windows Service, Launch Automatically, and the Service name "MySQL".
After you select the options, hit "Next >".
This next part is VERY important, please read all of the next part!
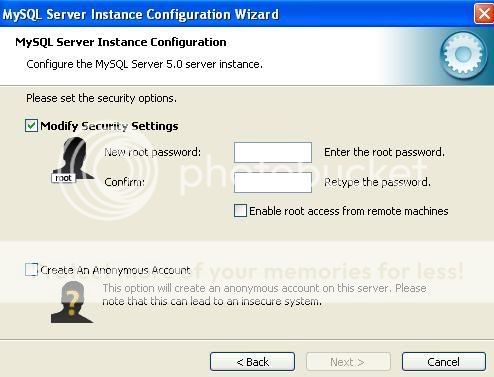
Select the "Modify Security Settings" Box, and type a password. Then type the same password in the Retype box.
Only select "Enable Root access from remote Machines" if you HAVE TO. This is a big security point, if left open and an easy to guess password is set.
UNCHECK "Create an Anonymous Account". THIS IS A HUGE SECURITY FLAW FOR PUBLIC SITES!
After you set these, and check to make sure they are correct, hit "Next >".
The next screen with have the text "Ready to execute" text. Hit "Execute" at the bottom. If all goes well, at the circles should get checks. If not, post and we will try to help. Hit "Finish".
Congradulations, you now have MySQL Installed and Configured.
See below for some easy tutorials on how to use it._____________________________________
MySQL Beginners Tutorials
These tutorials require a Web Server ( Need one? Check out our Apache Setup Guide ) and PHP ( Tutorial Coming soon! ).
If your MySQL database is on a different Computer as the webserver, you will need to check the box "Enable Remote Access" during configuration.
These tutorials assume you have a basic knowledge of of PHP. If not, check out our PHP tutorial ( Comming Soon! ).
Tutorial 1 - Connecting to your MySQL Server:
Functions used: mysql_connect();
Level: Beginner
PHP:
<?

$host = 'localhost';
$user = 'user';
$pass = 'pass';

$con = mysql_connect($host, $user, $pass);
if(!$con) die('There was an Error: '.mysql_error());

mysql_close();

echo 'Connected to your MySQL Database!';

?>
The Last line of code echos a nice string if it's able to connect to your MySQL server.
Tutorial 2 - Create/Drop Databases
Functions Used: mysql_connect();, mysql_query();
Level: Beginner + Tutorial 1
PHP:
<?

$host = 'localhost';
$user = 'user';
$pass = 'pass';

$con = mysql_connect($host, $user, $pass);
if(!$con) die('There was an Error: '.mysql_error());

$query = 'CREATE DATABASE dbname';

$result = mysql_query($query);
if(!$result) die('There was an Error creating Database: '.mysql_error());

mysql_close();

echo 'Created database!';

?>
The main part we need to look at is "$query = 'CREATE DATABASE dbname';".
In this line, we are setting the variable "$query" with a string we plan on sending to MySQL.
The real query is "CREATE DATABASE dbname". The MySQL command used here is "CREATE DATABASE", and the database will be called "dbname".
Also, to delete a Database, you would use the very simple command change:
"DELETE DATABASE dbname" instead of "CREATE DATABASE dbname".
If there is already a database with the same name, you will get an error.
There aren't many times where you would create databases with PHP, but in case you need to, you know how.
Tutorial 3 - Create Table + Basic Table Column Types
Level: Beginner/Intermediate
In this tutorial, we are going to create a table called "clients", with rows that store the Name, Company, email, and phone number of the "client".
You will need a database called "clientdata".
PHP:
<?

$host = 'localhost';
$user = 'user';
$pass = 'pass';

$con = mysql_connect($host, $user, $pass);
if(!$con) die('There was an Error: '.mysql_error());

$db = mysql_select_db('clientdata');
if(!$db) die('Error selecting Database "clientdata"');

$query = 'CREATE TABLE clients(
	name VARCHAR(30),
	company VARCHAR(30),
	email TEXT,
	phone TEXT
	)';

$result = mysql_query($query);
if(!$result) die('Error Creating Table!');

mysql_close();

echo 'Table Created!';

?>mysql_select_db($db_name); selects that database from the MySQL Server that you connected to via mysql_connect();.
And for the query string, lets break it down:
-CREATE TABLE: Pretty easy, create a table.
-clients: table name to create, can be changed to create new tables.
-name VARCHAR(30),; create a row called "name" with type "varchar(30)"
-company VARCHAR(30),: create a row called "compnay" with type "varchar(30)"
-email TEXT,: create a row called "email" with type "text"
-phone TEXT: create a row called "phone" with type "text"
Tutorial 4 - Update Table with new data
Level: Beginner/Intermediate
Okay, so we're going to assume you have the table from Tutorial 3 in your database already in this tutorial.
So you have your clients table set up with your site, and bam, you get a phonecall from your buddy John. He says he quit his job at the Marketplace and now works at McDonalds.
We better update the data with his new company so everything is up to date!
First, heres the code. Read through it and we'll explain it a bit after.
PHP:
<?php

$host = 'localhost';
$user = 'user';
$pass = 'pass';

$con = mysql_connect($host, $user, $pass);
if(!$con) die('There was an Error: '.mysql_error());

$db = mysql_select_db('clientdata');
if(!$db) die('Error selecting Database "clientdata"');

$query = 'UPDATE `clients` SET `company` = "McDonalds" WHERE `name` = "John"';

$result = mysql_query($query);
if(!$result) die('Error updating Table!');

mysql_close();

echo 'Table was updated!';

?>
Okay, the new part of this code would be the Query string. What does the query string mean in this code snippit?
UPDATE `clients` - We're going to update the table "clients" with the new data that follows.
SET `company` = "McDonalds" - We want to set the column "Company" with the new data "McDonalds". This will overwrite anything stored in the column "Company".
WHERE `name` = "John" - We want to update this data only where the data in the `name` column has the value of "John". If you don't use a "WHERE" case, it will update EVERY row of data with the company "McDonalds", and we don't want that.
Pretty simple, just practice a bit with this concept and you'll get it in no time.
Just a few notes:
Always remember to use a WHERE case in your query if you don't want every row to get updated with the new data you pass to it.
You can update more than one column in a query like follows:
PHP:
$query = 'UPDATE `clients` SET `name` = "Johnny", `company` = "McDonalds" WHERE `name` = "John"';_____________________________________
Using and Configuring your MySQL Server
Starting and Stopping the MySQL Server via command prompt
To start or stop your MySQL Server service, provided you installed it as a Windows Service, you will need to know your MySQL service name. It defaults to "MySQL", but if you changed it, make sure to enter the one you picked.
To stop the service, open up Command Prompt ( Unless you changed your start menu, "Run" should be in it. Then just run "cmd" ):
Code:
net stop mysqlTo Start the service, if it's stopped or you have it set up to not automatically start up, open Command prompt ( See above ) and type:
Code:
net start mysql
