Skins - Advanced Skinning - Brushing

Andrewgosu

The Silent Pandaren Helper
Reaction score
716
Advanced skinning: Brushing


Introduction:
This tutorial is going to show you how to work with brushes and intruments in order to create an absolutely new skin for a model.

I am going to use Adode Photoshop, but this all is do-able with almost every more advanced image editing program. (Including GIMP)


So shall we begin?

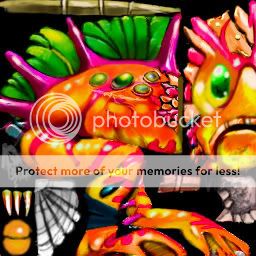
Open Image Extractor II or any other program, which allows you to export a Warcraft 3 skin from the mpq. I have chosen a Murloc to skin. The path for this specific Murloc is Units\Creeps\MurlocWarrior\Murlocwarrior.blp.
picture_1.jpg


Start by making a new above the base image (Shift+ctrl+N) and naming it base.
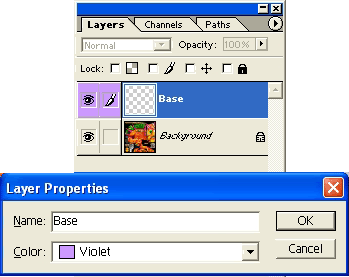
base.gif


Press D to set the foreground colour to black and background colour to white. Now, pick the bursh tool (
brush.jpg
), the brush shouln’t be too big or too small, around 25 pixels is fine. Start making a base for the skin. Cover the body, the legs and the head. If you have gone over the edges slightly, don’t worry, let it be.

picture_2.jpg


After done that, create another layer and rename it to scales. Pick a darker gray colour and make a scale-pattern round the backside and onto the legs of the murloc. If done that, pick a lighter version of gray and inline the made brushing with that colour. Lastly, take a very light version of gray and make some edges between the darker and lighter ones.

picture_3.jpg


When finished with that, create another layer between the base and scales layer. (You can drag it there with your mouse)

Now, start creating a certain texture, using black and the shade tones of gray. Be creative. You can toggle on/off the base layer visibilty (
visi.jpg
) to check that you are keeping the original shape of the skin.

pic4.jpg


Now, create a new layer and call it skin. (Its up to you what you name them, if you do. The key thing is actually using alot of layer, so that if something goes wrong, the whole process isn’t lost). Press D to reset the colours. Pick a very small brush, sized, around 1.5 – 2.5 pixels. Start making a black scales. It should remind something like ring mail. Don’t make the scales too big. (The zoom tool (
zoom.jpg
) is your friend in these kind of situations)

picture_5.jpg


After that, create another layer, called upper skin. Drag it to the top, so the 3 other layers are below it. Pick a darking red tone of the forground and repeat the process above.
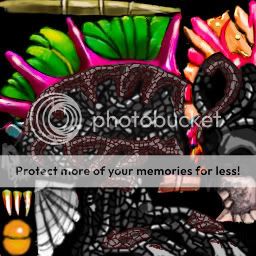
picture_6.jpg


In total you should have 4 layers + the background layer. Make another one, below the upper skin but above the 3 other layers. Name it spikes. Finished that, start brushing some grayish spikes. I used red too, in addition to the gray tones.
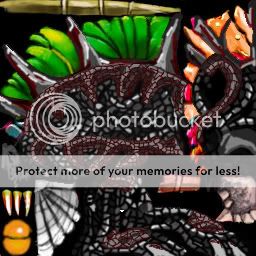
fangs.jpg


The fact the original eye of the murloc is quite good, makes our life easier. Use the pen tool (
pen.jpg
) and select and paste it. It should create a new layer automatically, when you paste it. Rename it to eye and let it be on top of the other layers. After that, hue that to red. (Image>Adjust>Hue/Saturation).

Now you should be able to desaturate the eye-claps and the harpoons the murloc holds on his back, because the brushing is one the other layer. Select them and desaturate. (Image>Adjust>Desaturate). Also, make them darker by -40 to -70. (Image>Adjust>Brightness/Contrast) .
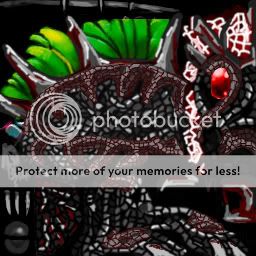
picture_8.jpg


After done that, and assured all is how you want, merge all the layer together. (But not the background, the original skin layer. Toggle the background visibility off, when merging)

Now, pick the burn tool (
burn.jpg
) and set the burn tool opacity from the upper menu to 50%. Start burning some of the lines (the body’s outline, some of the scales, spikes) darker. Use it moderately, not too much and not too randomly.

Duplicate the same layer and use Filter>Other>High Pass on it. Set the radius to 250. Now, set the duplicated layers’ blending mode to soft light. That makes the skin more sharper, without using the sharpen tool.

Meanwhile, I have covered the unbrushed parts of the head with shades of red and covered it with light scales. (Like we did with the body).
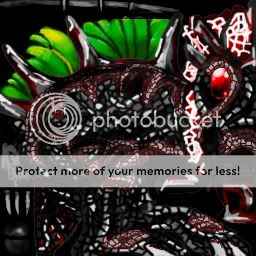
picture_10.jpg


As one can see, I have also brushed the wooden axe and the seashell to a shield and a metaly axe. (Doesn’t matter it didn’t come out very good, you can make it look 100x better.)

Now, if your skin looks almost the same as mine, all is done. But don’t run to save it yet! You have forgotten the alpha layer!

View the alpha layer. Channel>alpha layer. Pick white colour for your forground colour. This acts as an eraser in alpha layer. Delete the red alpha colour from the back part and from the legs. Now, press D to reset the colours. Black is used to alpha things out. Alpha out the green gimma-mam-bobs (Don’t know how to call them) between the spikes. After finished it, select a light gray colour for your foreground colour. As its between white and black, it doesn’t erase nor add alpha colour, but it lets the team colour in Warcraft to shine through, without getting those all-red-looking-and-squary-things. Now, having picked the gray colour, set the bursh size to very small again and brush some of the skin parts on the back of the murloc.

The alpha layer should look something like this, when finished.
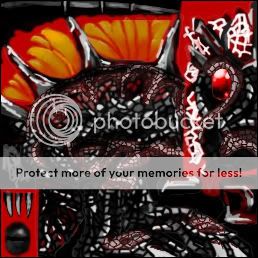
alpha.jpg


Now, you have reached to point, when it’s finally ready. Save it in TGA mode, 32 BIT and covert it back to .blp.

The original skin.

picture_1.jpg


The new skin.

picture_10.jpg


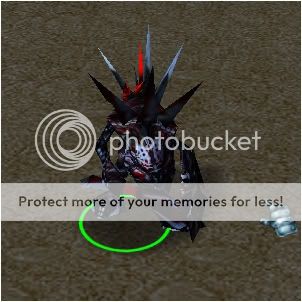
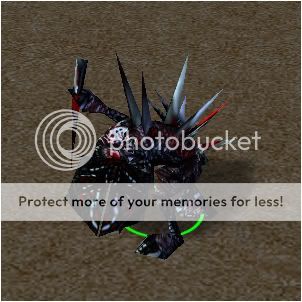
Ingame screenshots.

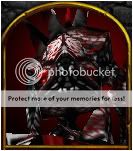
portrait.jpg


pic1.jpg


pic2.jpg
 

Quauhtli

I have the right to remain silent.
Reaction score
62
woooow nice!!!
+rep

if you want, you could put this skin on the bottem of ur tutorial and allow it to be dled... well your choice ofcourse:p
 

Andrewgosu

The Silent Pandaren Helper
Reaction score
716
Ah, yes. I was thinking, what I have forgotten. That was it.:rolleyes: Thanks.

Feedback is always appriciated.
 

Andrewgosu

The Silent Pandaren Helper
Reaction score
716
Thank you. Fixed some spelling mistakes and updated it little bit.

Edit: bump.
 

Blackveiled

Formerly, Ban-Lord
Reaction score
157
Nice. All I gotta say, such simple stuff and you can get amazing results.

+ Rep. Nice tut.

-ban-lord
 

Andrewgosu

The Silent Pandaren Helper
Reaction score
716
How are you meant to know what path the skin is when you import it after editing? What file do we save it as in the image extractor?

If you export it from mpq and the path is Units\Creeps\MurlocWarrior\Murlocwarrior.blp, you put the path Units\Creeps\MurlocWarrior\Murlocwarrior.blp when importing it back via import manager. The path remains the same. You save it .blp in image extractor.
 
G

Gordrid

Guest
If you export it from mpq and the path is Units\Creeps\MurlocWarrior\Murlocwarrior.blp, you put the path Units\Creeps\MurlocWarrior\Murlocwarrior.blp when importing it back via import manager. The path remains the same. You save it .blp in image extractor.

Ok, first off. Bravo. I read three of your guides, beginner and advanced and bravo. Very nice work.

However, I guess I'm still a bit ignorant to it because I was able to import the uncompressed blp file back in using the import manager. Then after scrolling through the addon to the thread I was able to find the above quote and tried it. It doesn't seem to be working though.

Specifically:
-I imported the blp.
-I put in the path (in import manager and then later in object editor) which is (units\human\HeroPaladin\HeroPaladin)

But when I go to see the finished work, the graphic remains the same and the little Head in the top left is a green screen....sometimes...other times its the character makeup sheet from the edit screen of GIMP. :/

Any thoughts would be appreciated.

Thanks.
 
G

Gordrid

Guest
wait a second....i think I might have had a revelation....and a 'doh!' at the same time.

When re-saving the blp with the Image Extractor and before importing with import manager, do you have to select the blp you are trying to overwrite?

(i.e., when I'm trying to overwrite the paladin.blp that came with teh program, I have to have it selected first?)

EDIT:

Ok I figured it out sort of. I was trying to apply the textures to the model to no avail. Obviously, because what you make in GIMP is for the icon and game interface screens. I got a model editor now and well...wish me luck because this looks ten times harder hehe.

Although, the icon and game interface still aren't loading properly. Any thoughts would be appreciated.
 
General chit-chat
Help Users
  • No one is chatting at the moment.
  • Varine Varine:
    How can you tell the difference between real traffic and indexing or AI generation bots?
  • The Helper The Helper:
    The bots will show up as users online in the forum software but they do not show up in my stats tracking. I am sure there are bots in the stats but the way alot of the bots treat the site do not show up on the stats
  • Varine Varine:
    I want to build a filtration system for my 3d printer, and that shit is so much more complicated than I thought it would be
  • Varine Varine:
    Apparently ABS emits styrene particulates which can be like .2 micrometers, which idk if the VOC detectors I have can even catch that
  • Varine Varine:
    Anyway I need to get some of those sensors and two air pressure sensors installed before an after the filters, which I need to figure out how to calculate the necessary pressure for and I have yet to find anything that tells me how to actually do that, just the cfm ratings
  • Varine Varine:
    And then I have to set up an arduino board to read those sensors, which I also don't know very much about but I have a whole bunch of crash course things for that
  • Varine Varine:
    These sensors are also a lot more than I thought they would be. Like 5 to 10 each, idk why but I assumed they would be like 2 dollars
  • Varine Varine:
    Another issue I'm learning is that a lot of the air quality sensors don't work at very high ambient temperatures. I'm planning on heating this enclosure to like 60C or so, and that's the upper limit of their functionality
  • Varine Varine:
    Although I don't know if I need to actually actively heat it or just let the plate and hotend bring the ambient temp to whatever it will, but even then I need to figure out an exfiltration for hot air. I think I kind of know what to do but it's still fucking confusing
  • The Helper The Helper:
    Maybe you could find some of that information from AC tech - like how they detect freon and such
  • Varine Varine:
    That's mostly what I've been looking at
  • Varine Varine:
    I don't think I'm dealing with quite the same pressures though, at the very least its a significantly smaller system. For the time being I'm just going to put together a quick scrubby box though and hope it works good enough to not make my house toxic
  • Varine Varine:
    I mean I don't use this enough to pose any significant danger I don't think, but I would still rather not be throwing styrene all over the air
  • The Helper The Helper:
    New dessert added to recipes Southern Pecan Praline Cake https://www.thehelper.net/threads/recipe-southern-pecan-praline-cake.193555/
  • The Helper The Helper:
    Another bot invasion 493 members online most of them bots that do not show up on stats
  • Varine Varine:
    I'm looking at a solid 378 guests, but 3 members. Of which two are me and VSNES. The third is unlisted, which makes me think its a ghost.
    +1
  • The Helper The Helper:
    Some members choose invisibility mode
    +1
  • The Helper The Helper:
    I bitch about Xenforo sometimes but it really is full featured you just have to really know what you are doing to get the most out of it.
  • The Helper The Helper:
    It is just not easy to fix styles and customize but it definitely can be done
  • The Helper The Helper:
    I do know this - xenforo dropped the ball by not keeping the vbulletin reputation comments as a feature. The loss of the Reputation comments data when we switched to Xenforo really was the death knell for the site when it came to all the users that left. I know I missed it so much and I got way less interested in the site when that feature was gone and I run the site.
  • Blackveiled Blackveiled:
    People love rep, lol
    +1
  • The Helper The Helper:
    The recipe today is Sloppy Joe Casserole - one of my faves LOL https://www.thehelper.net/threads/sloppy-joe-casserole-with-manwich.193585/
  • The Helper The Helper:
    Decided to put up a healthier type recipe to mix it up - Honey Garlic Shrimp Stir-Fry https://www.thehelper.net/threads/recipe-honey-garlic-shrimp-stir-fry.193595/

      The Helper Discord

      Members online

      No members online now.

      Affiliates

      Hive Workshop NUON Dome World Editor Tutorials

      Network Sponsors

      Apex Steel Pipe - Buys and sells Steel Pipe.
      Top