Tutorial Texturing Capes/Cloth in Photoshop

FireEffect

Gasp!
Reaction score
98
Texturing Capes and Cloth in Photoshop​

INFO:

In this tutorial I will be showing you how to texture a cape onto a unit looking realistic but still keeping the Warcraft feel to it. For this tutorial I am using Photoshop CS2, any earlier versions might have some tools missing. This tutorial can be applied to many different things, not just a cape. It can be used to make cloth armor, with proper shading applied. I will be using Wc3Viewer to extract my blps and to convert the files.

DIFFICULTY: 4/10 (Requires some previous skill and Photoshop knowledge)


Step 1 -
You will first need to pick a model to texture, in this example I will be using Medivh.

Step 2 -
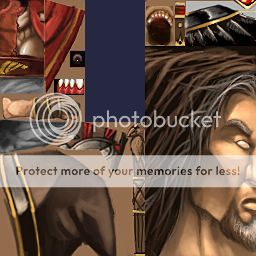
Select the area you want to create a new cape, I will be redoing his cloak thing. Fill the area in with your color of choice, i chose a dark blue.
tut1.png


Step 3 -
Use the burn tool (
burn.png
) at 6px and about 15 exposure and make a few lines down the cape area. The lines should not be straight and they should have a few curves in them.
tut2.png


Step 4 -
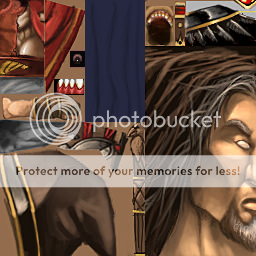
Use a smaller 3px brush with a higher exposure (about 20) to add definition to the previous lines. Keeping in the middle of the lines is not necessary, and going off the line completely adds a more realistic look, just try not to over do it.
tut3.png


Step 5 -
Use the dodge tool (
dodge.png
) with a large sized brush, about as big as the space between the dark lines, with 0 hardness and about 8 exposure, and brush in between the dark lines. You may need to use a smaller brush if the dark lines are closer to each other in some parts.
tut4.png


Step 6 -
Still using the dodge tool, use a smaller brush size with a higher exposure (about 10-15) onto the highlights.

Step 7 -
Repeat Step 6, but with a even smaller brush and a even higher exposure (about 15-20)
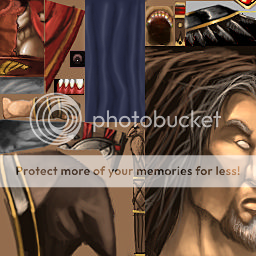
tut5.png


Step 8 -
Duplicate the cape layer and go to Filter>Artistic>Plastic Wrap using the settings: Highlight Strength - 15; Detail - 11; Smoothness - 7. You may need to alter it a bit if it is too bright by raising the detail setting.

Step 9 -
Set the plastic wrap layer to overlay with about 50% to 75% opacity.
tut5.png


Step 10 -
Merge the 2 cape layers. Go to Filter>Sharpen>Smart Sharpen and use the settings: Amount - 60%; Radius - 3px; Remove - Gaussian Blur. Press OK and the cape is complete!
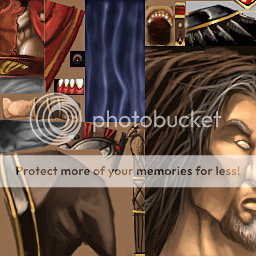
tut7png.png


Here is what the cape looks like on the model:
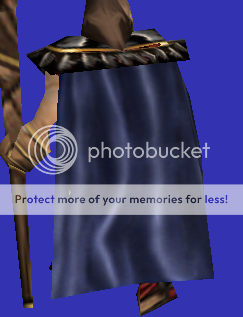
tut8.png


And another example of the technique using a 512x512 texture size:
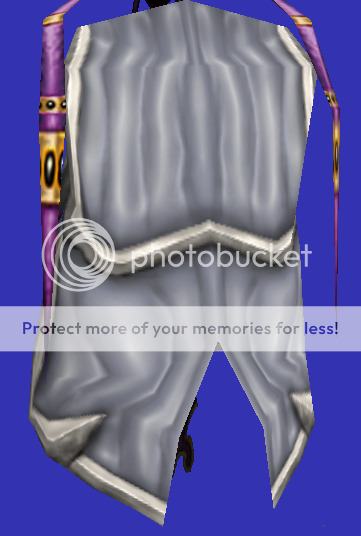
tut9.png
 

sidove

Member
Reaction score
22
you should add how to do that on all the clothes like hood, legs etc then it will kick ass and yes it is now :thup::thup::thup::D
 

CaptDeath

New Member
Reaction score
103
a litle bit more detail cause i have no idea what a burn tool is but i do have ps cs4
 
Reaction score
341
....You could google what the burn tool is, but i guess this is a tutorial so he should at least show the little icon of the burn tool. (
photoshop-red-chilly-icon5.gif
)
 

CaptDeath

New Member
Reaction score
103
why does no one have ps cs4?
--on topic--
and you dont mention what program you used
to extract out of wc3s mpq file and what you used to convert to .blp
 

WolfieeifloW

WEHZ Helper
Reaction score
372
Photoshop CS3/4 lag a lot more then CS2 when doing certain things.
That's why nobody has it.
And besides, CS2 does everything I've ever needed.

OnTopic: Nice tutorial FireEffect :) !
 

FireEffect

Gasp!
Reaction score
98
Thanks, does everything look good. And is there a thread for what a tutorial needs? I saw the sticky for resources, but no tutorial.
 

WolfieeifloW

WEHZ Helper
Reaction score
372
I haven't actually read through the tutorial yet, just scanned it.
I'll probably go through it tomorrow and tell you anything I notice ;) !
 

WolfieeifloW

WEHZ Helper
Reaction score
372
You just have to wait, get more reviews, and hope for the best.
A suggestion: make some kind of "headings" for each step, so their noticeable.
 

Zedzy

ℑΣÐℑΨ
Reaction score
41
It's a pretty good tutorial, but the cape needs a little work. It would look better if you explained how to make a border for the cape, because it has a very sharp edge to it. You might also want to describe how to alpha out parts of the cape.

Great pictures!

+rep

Edit: ^ looks like -rep (but its not!)
 
General chit-chat
Help Users
  • No one is chatting at the moment.

      The Helper Discord

      Members online

      No members online now.

      Affiliates

      Hive Workshop NUON Dome World Editor Tutorials

      Network Sponsors

      Apex Steel Pipe - Buys and sells Steel Pipe.
      Top