Tutorial Welcome to Thehelper.net

Exide

I am amazingly focused right now!
Reaction score
448
Exide’s
Welcome to Thehelper.net


*Part I: Basics
-[goto="A1"]Pre Words[/goto]
-[goto="A2"]Thehelper.net[/goto]
-[goto="A3"]The World Editor[/goto]
-[goto="A4"]FAQ’s[/goto]


[anchor]A1[/anchor]Pre words

First of all, I want to tell you all that I come from Sweden, so my English might not be the best.

Now that we’ve got that sorted out, we can begin.
The idea of this tutorial is to welcome new members to Thehelper.net, and to answer some of the regular questions that new members usually have. My tutorial will show you how to use a few, simple commands regarding Thehelper.net and the Warcraft III World Editor. Later in the Tutorial, I will show how to make a few simpler triggers.


[anchor]A2[/anchor]Thehelper.net

Welcome to Thehelper.net!
As the name hints, this website offers help regarding Warcraft III and all that comes with it.
Thehelper.net is a forum in where you can ask questions to other members, who will do their very best to answer as accurately as possible.

If you want people to take you seriously and “help them help you”. There are a few rules to follow. There’s a closed thread about the rules which you will be asked to read before posting any threads. These rules are not difficult to follow at all, in fact they are mostly common sense.
Here’s a short list of the rules: (Note: this list is how I feel about the rules, the real thread can be read here)
*When starting a new thread, try to explain your problem as detailed as possible.
-Tell us what is wrong. What happens, and why you believe it’s wrong. Also include information about what you have done, trying to solve the problem.
*Try searching before asking, it might save you and other people a lot of time.
-Usually people before you has had the same problem. If you use the search function before starting a thread, you might save yourself a lot of time.
*Language and common sense.
-If your mother tongue isn’t English, you might want to state this in the beginning of the thread. Unless you feel your English is understandable enough. Also do try to write properly and not use “leet-language” such as “own, pwn, lol, noob, rofl, 1337” and writing shorts for words really don’t save you that much time, such as: “u” instead of “you”, “y” instead of “why”, “no” instead of “know”, “gd” instead of “good”, or whatever it might be. This causes confusion and you will be taken less seriously if writing this way.
*Use of “smilies”.
When using smilies (plural of smiley, otherwise known as “emoticon”), do NOT spam them in the thread. One or two is, usually, more than enough. Seeing 5 identical smilies next to each other isn’t going to help anyone understand what you’re saying.
*More common sense.
Be polite. Someone might not always understand you, but after all, they’re trying to help you. So do try to keep your calm (even if your map that you haven’t saved for four hours just crashed on you), and explain your problem as well as possible in a polite way. This will encourage people to help you. (One wouldn’t want to help a person who just called one a moron, right?)

The list got pretty long, but it should all be implicit anyway. Just make sure you read the real rules before posting any threads and do your best to follow them.

Let’s say you are writing your first post and you want to know what all the icons, etc, does.
Firstly, at the top of the box in which you write, you have the usual font settings (similar to Microsoft Word, and tons of other writing software). With which you can set the font of your post. Size, color, bolded or not, and so on.
Then you have the more useful icons, such as ‘importing an image’, ‘inserting links’, wrapping code tags around your text’, and more.
The code tags are probably the one icon you will use the most. The icon looks like this: # and the actual tags look like this: [noparse]
Code:
 *Insert text here*
[/noparse]
This will change how your post will look, and is very useful when pasting trigger codes into a post for “troubleshooting”.
It is all very simple, really. If you want to know what your post will look like, there’s a ‘Preview Post’ button at the bottom of the box in which you write.


[anchor]A3[/anchor]The World Editor

The World Editor (WE for shorts) is your powerful software that comes together with Warcraft III. It is this you use when creating maps for Warcraft III.
I will show you a few things about WE that you need to know for making maps.

WorldEditor1.jpg


This bar here holds all the useful tools that you need for creating a map. From the left:
Terrain Editor (F3), Trigger Editor (F4), Sound Editor (F5), Object Editor (F6), Campaign Editor (F7), AI Editor (F8), Object Manager (F11), Import Manager (F12) and ‘Test Map’ (Ctrl+F9).
Note: Your bar might not look exactly like this. This might depend on what version of Warcraft III that you have. Warcraft III: Reign of Chaos (RoC) - the original, does not have a few things that the expansion has, Warcraft III: The Frozen Throne (TFT).
TFT is easier and more powerful than RoC, when it comes to mapmaking.

WorldEditor2.jpg


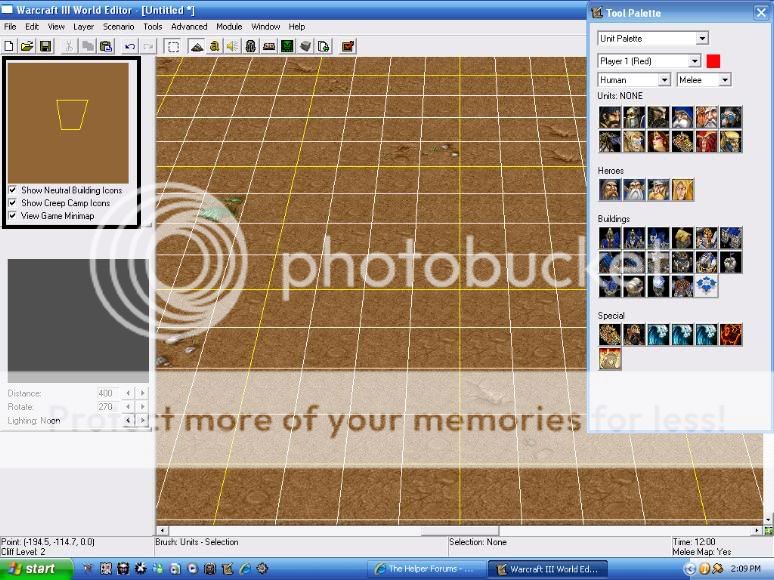
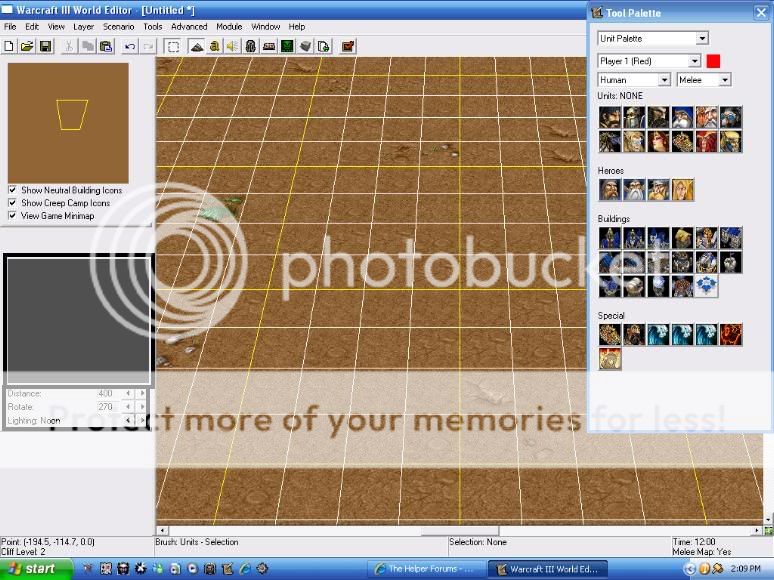
This is your Tool Palette.
It is very useful, it contains a few palettes:
Terrain Palette, Doodad Palette, Unit Palette, Region Palette and Camera Palette.
The Terrain Palette will help you adjust your terrain. What texture you want to use, if you want water and what height you want, and more.
The Doodad Palette contains lots of Doodads, which are usually used for decorating your maps. But also for adding useful stuff such as trees and gates.
The Unit Palette contains all units and buildings in the game, even the custom made ones that you might create later on.
The Region Palette helps you draw regions which will be great things to use in your map. For example: When a hero enters “Ambush Region” make 3 bandits attack the hero.
The Camera Palette lets you create cameras and place them across your map. This is very useful if you want a short movie to occur. (Maybe when the unsuspecting hero enters “Ambush Region”, perhaps?)

Let us take a quick look inside a few of the most used tools that WE has. Press F6 on your keyboard to bring up the Object Editor.

WorldEditor3.jpg


Here, in the Object Editor, you will find every object you have in the map, and look at it’s stats. You will also find other useful stuff, such as spells and doodads. In case you want to create your own spell. Just browse through the tabs at the top of the window.
Mark a unit (or spell or whatever) to bring up it’s stats to the right. There you can easily modify it to fit your purposes.

Another useful tool is the Trigger Editor.
Press F4 on your keyboard to view the Trigger Editor.

WorldEditor4.jpg


At the top of the window you can see the normal hotkey-icons, leading to different tools (such as the Object Editor, etc). You will also notice a rather special icon inside the Trigger Editor, the Variable Editor. The icon looks like a yellow X (hotkey: Ctrl+b). Variables are very useful when creating advanced triggers.
To the left of the Trigger Editor window, you can see the name of your map, one folder and one trigger (by default), named ‘Initialization’ and ‘Melee Initialization’. These are the default triggers for all maps.
By right clicking on either the name of the map, the name of the folder or the name of the trigger you will bring up a small menu containing the following options:
*Cut
*Copy
*Paste
*Delete
*View in Object Manager
*New Category
*New Trigger
*New Trigger Comment
*Enable Trigger
*Initially On
*Category is Comment
These commands are rather simple to understand, and helps you creating a new trigger or folder (Category).
The folders will help you keeping your Trigger Editor clean, making it easier for you to find your triggers.


[anchor]A4[/anchor]FAQ’s

This short chapter will contain a few FAQ’s and their answers. I will attempt to answer these FAQ’s more detailed later on in the Tutorial.
The idea of having FAQ’s in this Tutorial is for the frequently asked trigger problems that new members seem to have, and other things that the Warcraft world contains.

*What does FAQ mean?
FAQ is shorts for ‘Frequently asked Question’
*What do WE, RoC, TFT, JASS and Dota mean?
I answered some of these questions earlier in the Tutorial, but in case you forgot:
WE are shorts for World Editor, which is the program you use when making maps for Warcraft III.
RoC means Reign of Chaos and refers to the original Warcraft III version.
TFT stands for The Frozen Throne and is the expansion version to Warcraft III: RoC.
JASS, a new word to be familiar with. JASS is the language that Warcraft III uses for …everything. It is the raw code for Warcraft III. I don’t know what it stands for but it doesn’t matter anyway.
Dota stands for Defense of the Ancients. Most of you have probably played Dota on Battle.net. It’s one of the most famous custom made maps for Warcraft III ever. Most people refer to Dota Allstars when they say Dota. Allstars is actually the TFT-version of Dota (larger, funnier, better, in my opinion.) The “real” Dota was made for RoC.
*What is reputation in Thehelper.net?
Reputation is a funny thing, actually. It shows how much reputation (rep) each member of Thehelper.net has got, to the right of his/her avatar and name. Just below the Post counter. It shows as a small green (or red) square. Green means positive (+) and red means negative (-). It really doesn’t do anything, but it gives other members a clue of how skilled/helpful you are. (If you have a high reputation, they figure you must’ve helped a lot of people on Thehelper.net, and the other way around.)
It’s a sort of competition.
If someone helps you with a problem that you have, be sure to add to his/her rep by clicking on the scale icon above the Post counter and the person’s rep.
*Trigger FAQ’s
I will put a few common questions that new members have here, and I will attempt to answer them more detailed in later posts. (Click on the arrows below to go directly to the answer.)
-How do I fix so that when my Hero acquires two items, they become one, powerful item? [goto="A5"]-->[/goto]
-How do I create a Hero selecting sequence at the start of my map? [goto="A6"]-->[/goto]
-How do I do the above, but with dialogs instead of units? [goto="A7"]-->[/goto]
-How do I make everyone/someone see the entire map? [goto="A8"]-->[/goto]
-What are Memory leaks? [goto="A9"]-->[/goto]
-How can I teleport units from one point to another?


[anchor]A5[/anchor]How do I fix so that when my Hero acquires two items, they become one, powerful item?​

To solve this we need to use triggers.
Let us pretend that we have made the two items that we want to merge and the third, powerful item already.
Then place the two weak items on your map, to test the following trigger that we are about to make.

Open the Trigger Editor (F4) and add a new trigger.
Right click on an existing trigger or folder (Category) and choose the ‘New Trigger’ command.
Now in the bottom-right of the Trigger Editor, you will see a new trigger which contains:
Events
Conditions
Actions
We start from the top by adding an Event. The event is what fires the trigger. (For example, A unit dies. In this case we will use the ‘A unit acquires an item’ -event.)
Now, right click on the ‘Events’ text and click the ‘New Event’ command. This will bring up a brand new, small window. There are two scroll lists in this small window. To narrow down your search, click the above one (-All) and choose the bottom option ‘Unit’.
Now, click the below scroll list (which should have changed into ‘Specific Unit Event’). Click this list and use ‘Generic Unit Event’. Now you will see the text: ‘A Unit Dies’ below.
Click on the ‘Dies’ word, to bring up a few options. In this big list, choose the ‘Acquires an Item’, and then click ‘Ok’.
This will add the ‘Unit - a unit Acquires an item’ -event to your trigger.

Now we will add the Conditions. These will help us define what we want our trigger to do.
Start the same way as you did with the Events, but choose ‘New Condition’ this time.
Choose the ‘Boolean Comparison’ in the top scroll list (it should be select by default). Then click on the “link” to the left. Here choose: ‘Hero - Hero has item of -Type’. Then click on the link to the left, below saying: ‘(Triggering unit)’ and change this to ‘Event Response - Hero Manipulating Item’ and click ok. Then click the link to the right (the item, should be Tome of Experience, by default) and choose one of the two weaker items that you have. Then click ‘Ok’ 2-3 times and you should have added your first condition.
This condition checks if the Hero that acquires an item has one of the two weaker items.
If, for example, this item’s name is ‘Assassin’s Blade’ (as in my map), the condition will look like this:
Code:
((Hero manipulating item) has an item of type Assassin's Blade) Equal to True
Now, all you have to do is to mark this condition and right click on it then choose the copy command, and finally paste it. Now you will have two identical conditions above and below each other. Choose the below one and double click on it, then click on the long link to the left and choose the item (Assassin’s Blade) and then find your second item in the list.
(My second item is the Orb of Fire). When you’ve chosen your item, click ‘Ok’ all the way back, and you will now have two conditions that looks like this:
Code:
((Hero manipulating item) has an item of type Assassin's Blade) Equal to True
((Hero manipulating item) has an item of type Orb of Fire) Equal to True
Note: the types of item is supposed to be yours, I just use these two in this example.
Now, add the actions.
We will need three actions, two for removing the old items and one for adding the new.
Start as you did with the Events and Conditions but this time choose ‘New Action’ instead.
Chose ‘Item’ in the above scroll list, and choose ‘Remove’ in the below one.
Then click on the link saying ‘(Last Created Item)’ and choose ‘Item Carried By Hero Of Type’ from the scroll list. Then define the Hero as ‘Event Response - Hero Manipulating Item’ and then define the type of item as one of the items in your condition (Assassin’s Blade).
Then do the same copy - procedure as you did with the Conditions, and change the item to the next (Orb of Fire).
Now you should have two Actions saying:
Code:
Item - Remove (Item carried by (Hero manipulating item) of type Assassin's Blade)
Item - Remove (Item carried by (Hero manipulating item) of type Orb of Fire)

Now, add the final action. Start with the ‘New Action’ command, choose ‘Hero’ in the above list and then choose ‘Create item for Hero’ in the below list. Change the default link (Tome of Experience) into whatever item that you want to have (the powerful one). Then lastly change the ‘(Triggering Unit)’ text into: ‘Event Response - Hero manipulating Item’ and click ‘Ok’.

Your trigger should now be done and should look like this:

Code:
Blade of Fire
    Events
        Unit - A unit Acquires an item
    Conditions
        ((Hero manipulating item) has an item of type Assassin's Blade) Equal to True
        ((Hero manipulating item) has an item of type Orb of Fire) Equal to True
    Actions
        Item - Remove (Item carried by (Hero manipulating item) of type Assassin's Blade)
        Item - Remove (Item carried by (Hero manipulating item) of type Orb of Fire)
        Hero - Create Searing Blade and give it to (Hero manipulating item)

This means that:
When a unit acquires an item
And has the two items of type Assassin’s Blade and Orb of Fire
The same unit will lose both items and have them replaced by a third, called Searing Blade.
Simple!

Now to see if this works, save your map and run it. Order your hero to pickup the pre-placed items (Assassin’s Blade and Orb of Fire) and watch what happens.

EDIT: Added the example map for this trigger.
Download and open the map if you want to see what the trigger looks like in WE.
 

Exide

I am amazingly focused right now!
Reaction score
448
[anchor]A6[/anchor]How do I create a Hero selecting sequence at the start of my map?​


Let us assume that you have already created the heroes that you want. And let us jump straight to the problem.
First thing you need to do is to place the start location of the players (Player 1 (Red), Player 2 (Blue), and so on..) In a clear area, where you intend to keep your hero select sequence. You might want to seal this area off, either by using boundary or cliffs (both can be found in the Terrain Palette).

HeroSelect1.jpg


Then we want to place the heroes and the circles of power inside this little valley.
The circles are there to show the players that when they enter this circle, they will choose the nearby Hero. Make sure you place one circle in front of every hero, in a way so that everyone understands it’s purpose.
Now, place your heroes inside the valley, one of each kind. And follow up by placing the circles of power. Make sure that you double click on each hero that you have placed, to bring up it’s properties. Then make sure that this certain unit belongs to ‘Player: Neutral Passive’ if not the hero might attack other heroes, or worse. -As Neutral Passive, the unit will only stand still and do nothing, and that is exactly what we want.
The circles can be found in your Unit Palette, under Neutral passive -> Campaign. They come in three sizes.

HeroSelect2.jpg


Now that you have your heroes, start locations and circles in place, you need to add some regions.
Go to the Region Palette in your Tool Palette and click on the small, square button that looks kind of like a grid in grey color, it says ‘add’ if you hover the mouse over it. (When you activate it, it will turn rather greenish). Then draw a square Region inside your circles of power and name them something appropriate. For example, if the hero next to the circle is a human - paladin, name the region Paladin. Then do the same thing with all your other circles too.
When you draw a Region, notice that it will be added in the list below the ‘add’ button, in your Region Palette. The first region should be named ‘Region 000’ automatically, the second ‘Region 001’ and so on.
As long as your ‘add region’ function is activated, you will draw regions. Press the ‘Esc’ (Escape) key on your keyboard to deactivate this function. When the function is deactivated, you can select your regions. Either from the list or directly from the big window, you can also change the size and move your regions around in the big window.
Double clicking on a region will bring up the ‘Region Properties’ window. Here you can rename the region, change its colors and some other things. All you need to worry about now, though, is the name of the Region.
We need one more Region before we are done. This region will be the one outside the “valley”. -The region in which your hero will spawn when it has been chosen. We could call this Region the ‘Spawn’ region.

Now you have everything ready, now you need some triggers.
Open the Trigger Editor (F4), make sure that the Melee Initialization is correct set. Usually I delete this whole trigger, but if you want to keep some of the actions, make sure that you delete these ones:
Code:
Melee Game - Remove creeps and critters from used start locations (for all players)
Melee Game - Create starting units (for all players)
Melee Game - Enforce victory/defeat conditions (for all players)
Now, add a new trigger and that looks like this: (If you don’t know how to create triggers, re-read this Tutorial from the top. There’s a point at where I explain trigger - making pretty detailed.)

Code:
Paladin
    Events
        Unit - A unit enters Paladin <gen>
    Conditions
    Actions
        Unit - Remove (Triggering unit) from the game
        Unit - Create 1 Paladin for (Owner of (Triggering unit)) at (Center of Spawn <gen>) facing Default building facing degrees
        Camera - Pan camera for (Owner of (Triggering unit)) to (Center of Spawn <gen>) over 1.50 seconds

As you can see from this trigger:
When a unit enters the region that you have named ‘Paladin’. The Triggering unit (the unit that enters) will be removed from the game. Then a Paladin will be created for the owner of the Triggering unit, in the center of the region that you have named ‘Spawn’. Finally the camera will be panned to ‘Spawn’ region, for the player to easily see where his/her hero is.

Now, create one of this trigger for each hero and region. Then there is only one last thing to do.
To add the ‘Hero Selector’, the unit which will actually enter the region.
This can be done in a few ways. One way is very simply, namely to place it in the map in the same way that you placed the Heroes, and make sure that each player has their own Hero Selector.
The Hero Selector can be any type of unit, as long as it is invulnerable and/or unable to fight. Making it a ground unit is also a good thing to do. Usually animals are good for this role, such as deers, pigs or dogs.
Another way of doing it is with triggers:

Code:
Hero Selector Red
    Events
        Time - Elapsed game time is 2.00 seconds
    Conditions
        (Player 1 (Red) slot status) Equal to Is playing
    Actions
        Unit - Create 1 Hero Selector for Player 1 (Red) at (Player 1 (Red) start location) facing Default building facing degrees

This trigger fires after 2 seconds of game time. You can change this, of course, use the ‘Map initialization’ event if you want this trigger to fire the first thing the game starts.
This trigger checks if Player 1 is playing or not, if he/she is playing, then the actions will start, else nothing will happen.
If Player 1 (Red) is playing, a unit (the Hero Selector) will be created at Player 1 (Red)’s Start Location. -Which you have already placed in the valley.

Create one trigger just as this one, for each team that you want in your map, and that’s it.
One last thing to think of: You want the players inside the same valley to be allies. If not, make sure that their heroes spawn in a different region (‘Spawn’), or else they will begin fighting right after the spawn.

I uploaded the map, feel free to download it and check out the triggers.


[anchor]A7[/anchor]How do I do the above, but with dialogs instead of units?​


Now, a few of you might wonder how dialogs work, and what one can use them for.
This part will show you, very simply, how to set up one dialog for choosing heroes.
Let us assume that you have already created your heroes that you want on the map.
First thing to do is to find a decent ‘Spawn’ point, at where you want your Hero to spawn when you have picked it.

With that done, we can start working on the trigger.
For this trigger, you will need to use Variables.

First things first, so we start by making the Variables.
Open your Trigger Editor by pressing F4 on your keyboard. Then continue into the Variable Editor. The Variable Editor Icon can be found at the top of your window and looks like a yellow X. Hotkey: Ctrl+b

The Variable Editor is really simple, either add, edit or delete a variable.
Click on the Icon with the green X that says ‘New Variable’ to add a variable (Ctrl+N)
Now type in the name of the variable, the name of any variable can be anything at all. (As long as it doesn’t contain “forbidden” symbols such as Å Ä Ö or spaces, etc.) As long as you keep track of what Variable is what, you can name it anything. Best thing to do, though, is to name it something that regards it’s purpose.
In this case, we’re adding a Dialog Variable, so naming it Dialog / Dialog1 or something similar, would be a good idea. (I’m going to use ‘Dialog1’.)

So, name your Variable and then choose Variable type: Dialog.
Do not check the ‘Array’ box. Simply click ‘Ok’.
Then add a new Variable, this time we will use a Dialog Button.
Once again, name it something that regards it’s purpose and then choose the Dialog Button Variable type. (I named mine ‘DialogButton’).
This time, check the ‘Array’ box, and choose size. Array is used for having multiple variables in one. It mainly saves time.
Set the size of the Array for as many Heroes that you have. I’m going to use 4 in this example.

Now you should have 2 Variables in your Variable Editor, Dialog1 and DialogButton. Click ‘Ok’ to accept and close the Variable Editor.

Now create a new trigger and do this:

Code:
Dialog
    Events
        Time - Elapsed game time is 2.00 seconds
    Conditions
    Actions
        Dialog - Clear Dialog1
        Dialog - Change the title of Dialog1 to Select your Hero:
        Dialog - Create a dialog button for Dialog1 labelled Paladin
        Set DialogButton[1] = (Last created dialog Button)
        Dialog - Create a dialog button for Dialog1 labelled Wizard
        Set DialogButton[2] = (Last created dialog Button)
        Dialog - Create a dialog button for Dialog1 labelled Dwarf
        Set DialogButton[3] = (Last created dialog Button)
        Dialog - Create a dialog button for Dialog1 labelled Blood Mage
        Set DialogButton[4] = (Last created dialog Button)
        Dialog - Show Dialog1 for Player 1 (Red)

Now your first Dialog is created.
This will show a Dialog which asks the Player to select a hero, and then give 4 alternatives:
Paladin, Wizard, Dwarf and Blood Mage.
Now, we’re going to set the second trigger, which checks what hero the Player chooses, and then spawn that hero for the player.

Code:
Hero Spawn
    Events
        Dialog - A dialog button is clicked for Dialog1
    Conditions
    Actions
        If ((Clicked dialog button) Equal to DialogButton[1]) then do (Unit - Create 1 Paladin for (Triggering player) at (Center of Spawn <gen>) facing Default building facing degrees) else do (Do nothing)
        If ((Clicked dialog button) Equal to DialogButton[2]) then do (Unit - Create 1 Archmage for (Triggering player) at (Center of Spawn <gen>) facing Default building facing degrees) else do (Do nothing)
        If ((Clicked dialog button) Equal to DialogButton[3]) then do (Unit - Create 1 Mountain King for (Triggering player) at (Center of Spawn <gen>) facing Default building facing degrees) else do (Do nothing)
        If ((Clicked dialog button) Equal to DialogButton[4]) then do (Unit - Create 1 Blood Mage for (Triggering player) at (Center of Spawn <gen>) facing Default building facing degrees) else do (Do nothing)

This trigger contains 4 If / Then / Else -actions.
They check if one conditions is true, if so it runs an action, if not it runs another action.
The else action in this case is ‘Do nothing’, which is rather obvious what it does.
And the 4 different conditions and actions are = DialogButton 1 - 4 and Paladin, Wizard, Dwarf and Blood Mage.

Basically, if you click on the button called Paladin, you will receive one Paladin.

This certain trigger, however, will only work for 1 player. You must add more variables and more Dialogs in order for all players (one for each) to have their own Dialog.

DialogSelect.jpg


EDIT: Added the second part of Hero Selecting (with Dialogs) and also uploaded the map for Dialogs.
 

Doom-Angel

Jass User (Just started using NewGen)
Reaction score
167
Nice Tut (not for me but still might help for begginers :p) anyway +Rep :D
 

1337Elite

New Member
Reaction score
14
Great for the beginners. :D
Just set our hopes that they actually read this, too. And I never knew, before I read this, that when one says "y", you refer to you. :p
 

Doom-Angel

Jass User (Just started using NewGen)
Reaction score
167
"u" stand for you not "y", "y" is for why

Edit: im sure there were 3 posts where did 1 of them disappear?
 

SFilip

Gone but not forgotten
Reaction score
633
> where did 1 of them disappear?
Merged with the first.
If approved the WET script only "sees" the first post in a topic so its better to keep it all together.

And "y" can stand for both "you" or "why", even "yes" sometimes.
 

Ghan

Administrator - Servers are fun
Staff member
Reaction score
888
Great Tutorial :D And your English is more than adequate.
 

Thanatos_820

Death is Not the End
Reaction score
91
Hmm...tutorial seems to be missing some steps and the extras :p. Allow me to fill some in:

WE2.jpg


This area is the map previewer in the World Editor, it allows you to see the way how the minimap might look ingame. As you can see below, there are 3 command boxes you may check, or check off.

Show Neutral Building Icons - Shows all neutral buildings' icons like a Goblin Merchant or a Tavern.

Show Creep Camp Icons - Shows several Green, Orange, or Red dot in the World Editor, marking the difficulty of creeps in the pack. The dots only reveal themselves if you have creeps placed in the World Editor.

View Game Minimap - Removes the black areas in your minimap in the World Editor, except for placed boundary. The minimap previewer will eliminate those extra unused spaces which are hovered in black, allowing the World Editor to retain the size of your minimap, but not ingame.

WE1.jpg


This is the Object Previewer, it allows you to view the model of an Object, for example, a Footman. When viewing the object, there are 3 commands you may use.

Distance - Clicking the Left Arrow will put your camera closer to the object, clicking the Right Arrow will move you away from the object.

Rotation - Clicking the Left Arrow will change the degree angle of the object by -45, clicking the Right Arrow will change the degree angle of the object by +45.

Lightning - You can change the time of day here to view the unit in that time. You can choose from Dawn, Noon, Dusk, or Midnight.

---------------------------------------------------------------------------------------------

Other than that, it's a good start for new users to The Helper and the World Editor ;).
 

Exide

I am amazingly focused right now!
Reaction score
448
[anchor]A8[/anchor]How do I make everyone/someone see the entire map?​


This one is pretty easy. It can be done in a few different ways.
So I’m going to show these few different ways to you.

The only thing we need for this is one/or a few triggers. As usual when creating triggers, we open the Trigger Editor (F4), and create a new one. Name it something appropriate, such as ‘Visibility’.
Now, we’re going to start with a trigger that gives all players perfect sight of the map.
And we’re going to use the event ‘Map initialization’, this means that the trigger will start as soon as the map does.
Now, create a trigger that looks like this:

Code:
Visibility
    Events
        Map initialization
    Conditions
    Actions
        Visibility - Create an initially Enabled visibility modifier for Player 1 (Red) emitting Visibility across (Playable map area)
        Visibility - Create an initially Enabled visibility modifier for Player 2 (Blue) emitting Visibility across (Playable map area)
        Visibility - Create an initially Enabled visibility modifier for Player 3 (Teal) emitting Visibility across (Playable map area)
        Visibility - Create an initially Enabled visibility modifier for Player 4 (Purple) emitting Visibility across (Playable map area)

This means that when the map starts, player 1, 2, 3 and 4 will have visibility over the area ‘Playable map area’ (in other words, the whole map -sort of).

Now this is easy enough. But it requires 4* actions, we can do the same thing with only one action, but two triggers. This can be effective if you’re planning on using the other trigger for more than just this purpose. (* = the number of players that your map has).

What I mean by two triggers is this:
The first trigger sets a certain variable (Player Group) which can then be used for more than just the visibility purpose. To set your Player Group, you must first create a variable (I’m going to name mine ‘All_Players’, the Player Group does/should not have/be an array.). Then add this trigger:

Code:
Player Group
    Events
        Map initialization
    Conditions
    Actions
        Player Group - Pick every player in (All players) and do (Player Group - Add (Picked player) to All_Players)

This trigger is rather obvious, it takes all players in the map and puts it in your variable, ‘All_Players’.
Now you can use these players for several different triggers. Such as Visibility, or setting alliances, etc.

When this is done, simply modify your visibility trigger a little:

Code:
Visibility 2
    Events
        Map initialization
    Conditions
    Actions
        Player Group - Pick every player in All_Players and do (Visibility - Create an initially Enabled visibility modifier for (Picked player) emitting Visibility across (Playable map area))

This trigger picks all players from your variable ‘All_Players’ and grants them visibility across *region (*Playable map area).
This way you can use the Variable in several triggers.

If you want to make the same thing even easier, you can skip the variable and do this:

Code:
Visibility 3
    Events
        Map initialization
    Conditions
    Actions
        Player Group - Pick every player in (All players) and do (Visibility - Create an initially Enabled visibility modifier for (Picked player) emitting Visibility across (Playable map area))

NOTE: This trigger does NOT use the variable ‘All_Players’, it uses a function that is already set in the trigger editor, called ‘All players’ (notice the underline and the non-capitalized p in ‘players’).
This trigger is the same as the very first one, but with only 1 action instead of 4.
This trigger is simple, but gives all players visibility. (You might want to give only certain players visibility, if that’s the case, you will want to use either trigger number 1 or 2*. - *= if you change the variable.)

And now, for the very last trigger we’re going to use a “special” function. Instead of giving visibility, we’re going to steal some. For this we need a region. I’m going to make a big one in the center of the map, and call it ‘CenterRegion’.
Then add this trigger:

Code:
Fog Center
    Events
        Map initialization
    Conditions
    Actions
        Player Group - Pick every player in (All players) and do (Visibility - Create an initially Enabled visibility modifier for (Picked player) emitting Fog of war across CenterRegion <gen>)

This trigger, as many others, pick all players (NOTE: Not the variable ‘All_Players’), and emits Fog of war across *Region (*= the region that we created, ‘CenterRegion’).
This will make your new region covered in Fog of war, but if a unit enters it will show what hides within. If the unit leaves, the region will become foggy again.
NOTE: Since this trigger is “special”, it won’t work together with the ones we made before (visibility across playable map area), unless if you do this:
Make the Fog -trigger fire BEFORE the visibility -trigger.
(For example: have the Fog -trigger’s event to be: ‘Map initialization’ and the Visibility -trigger’s event to be: ‘Time - Elapsed game time is 2.00* seconds’. *= 1-2 seconds, or more, whatever you want.)
If you have the Visibility -trigger fire BEFORE the fog -trigger, the fog -trigger won’t work. This means, you will see the whole map anyway.

To straighten this out some, I placed the “special” triggers in my map, in their own Category. And disabled both, you will have to enable them and disable the other triggers to see how this works. As always, you can download my Visibility map to see what the triggers looks like in WE.


[anchor]A9[/anchor]What are Memory leaks?​


You have probably heard the term ‘Memory leaks’ or simply ‘leaks’ by now.
This term can usually be found in the sentence: ‘This trigger has leaks / memory leaks’.
There’s a lot to know about memory leaks, but I’m just going to introduce it to you briefly.
A more detailed tutorial about memory leaks can be found here.

First thing to know about memory leaks, is that they are bad. They are something you don’t want in your map.
A memory leak is caused when you create a trigger in the wrong way. If you have a lot of memory leaks in your map, it might lag when you’re playing it, or even crash.
The worst place to have a memory leak is in a trigger that loops/fires often. Such as a trigger with the event: ‘Time - Every 0.50 seconds of game time’. If a trigger with this exact event would contain a memory leak, it would case 2 leaks of memory every second. After 30 minutes, this would mean your one trigger has created 3600 leaks. This might cause some heavy lag.

So how do you know when a trigger contains a leak?
Well, there are a few rules to follow. (As explained in the more detailed tutorial that I linked to, above) I will just show you a few regular leaks and how to fix them.
To fix a memory leak, you will need a variable. The idea is to store the coming leak in this variable, then after using it, remove it.
Points are the most common leak, I believe.
Point leaks are created when you specify a point on your map. For example:
Code:
Unit - Create 1 Footman for Player 1 (Red) at (Center of (Playable map area)) facing Default building facing degrees
Firstly, what happens? -Something is created. If something is created, it needs a place to spawn, right? And it is this place that will cause the leak. (In this case ‘Center of (Playable map area)’)
Because it is where the unit will be created.
So what we do is to store this location in a variable, and then “empty” this variable.

Start with creating a Point Variable. This is done in the Trigger Editor (F4) -> Variable Editor (Ctrl+b). Name it anything that you like. ‘Location’ is an appropriate name for this variable.
Then create this trigger:

Code:
Spawn correct
    Events
        Map initialization
    Conditions
    Actions
        Set Location = (Center of (Playable map area))
        Unit - Create 1 Footman for Player 1 (Red) at Location facing Default building facing degrees
        Custom script:   call RemoveLocation(udg_Location)

The very first thing this trigger does is to set our variable (Location) to where we want it. (Center of (Playable map area).)
The second thing is to spawn the Footman. Notice that the Footman is being spawned at ‘Location’, which is your variable that you just set.
Now, we have got our leak stored in the little box that is your variable. All we need to do now is to take out the trash.
This can easily be done with the help of a custom script. Add an action with the ‘Custom script’ function. Then type ‘call RemoveLocation(udg_Location)’ in your script.
This will empty the variable ‘Location’ of all information. In other words, this cleans up your memory leak. ‘RemoveLocation’ means that a point will be removed. The text within the ( ) defines the point. Notice that we are removing the point in the variable called ‘Location’ with this action.

So, this leak is probably the most common one, the point leak. Now, it’s easy to remember that, whenever you do something that involves regions (points) make sure you clean it from memory leaks. I will show you one or two more point leaks for you to get the hang of it.

Let us pretend that we want to spawn two footmen in different regions.
First create the regions on your map and name them whatever you want (‘Region1’ and ‘Region2’, in this example).
Then add this trigger:

Code:
Spawn correct 2
    Events
        Time - Elapsed game time is 3.00 seconds
    Conditions
    Actions
        Set Location = (Center of Region1 <gen>)
        Unit - Create 1 Footman for Player 1 (Red) at Location facing Default building facing degrees
        Custom script:   call RemoveLocation(udg_Location)
        Set Location = (Center of Region2 <gen>)
        Unit - Create 1 Footman for Player 1 (Red) at Location facing Default building facing degrees
        Custom script:   call RemoveLocation(udg_Location)

In this trigger we do the exact thing as before, but two times and in different places. The only thing you need to know in this trigger is that: You can use the same Variable as many times as you want to, as long as you clean it up (with a ‘Custom Script’) before changing it’s value.
(Notice how we clean up the first region before adding the second to our variable.)

One last trigger regarding memory leaks.
This trigger will contain 2 different leaks, the Point leak and a ‘Special Effect leak’.
What we do is that we create a special effect at a point to add some nice effects to our map. But this, of course, leaks memory. So we clean it right up.
This trigger only needs the Point Variable that you made earlier (‘Location’).
We’re going to create a special effect that looks like the thunder clap in a new region (Region3) and then clean the trigger.

Code:
Special Effect correct
    Events
        Time - Elapsed game time is 5.00 seconds
    Conditions
    Actions
        Set Location = (Center of Region3 <gen>)
        Special Effect - Create a special effect at Location using Abilities\Spells\Human\ThunderClap\ThunderClapCaster.mdl 
        Special Effect - Destroy (Last created special effect)
        Custom script:   call RemoveLocation(udg_Location)

What this trigger does is to set the Point Variable (Location, as usual) to the correct region (Region3). Then it creates a special effect that looks like the thunder clap spell. After that it removes the (Last created special effect, to remove the Special Effect leak). And finally, it cleans up the Point leak with the regular custom script.
Now, after 5 seconds of gameplay, you will experience a thunder clap stomp in Region3.
-This can be effectively used when making your own spells, or just want to add a nice touch to your map. (There are, of course, tons of other special effects that can be used.)

I uploaded the map, if you want to see what the triggers looks like in WE.
 

Exide

I am amazingly focused right now!
Reaction score
448
Updated the thread (second post).
Please tell me if I missed something or if I made a misstake somewhere. (Hopefully I didn't :p)

Also, please don't point out stuff such as memory leaks. I will bring them up later, briefly. :p
And I don't feel that memory leaks are for the newest of our members.

Be patient, more will come! :D
 

Master

Thou shall be helped by...The Black Adder!
Reaction score
72
This a very nice thread, maybe you could merge threads with Jindo's thread :)
I would rate it 5 stars ;)
 

Exide

I am amazingly focused right now!
Reaction score
448
Thank you.
I didn't know Jindo's Tutorial existed. :eek:

Think mine would be worthy such an honorable merge? :p

Oh, and I updated the Second post again. Part 2 of Hero Selecting is finished. :)
 

Exide

I am amazingly focused right now!
Reaction score
448
*Bump*

Added two new answers to the FAQ's (Visibility and Memory leaks).

Would be great if someone could move up that post. (Post number 10)
So that it would be just below post number 2. (If this is possible?)
 

Master

Thou shall be helped by...The Black Adder!
Reaction score
72
So that it would be just below post number 2. (If this is possible?)
Moderation tools - merge posts. Similar result to your desored one :)

So wait for a mod or admin to do that.
 

Exide

I am amazingly focused right now!
Reaction score
448
*Bump*

EDIT: Oh yea. As many of you already know, the anchors are acting weird. Hopefully they'll be fixed soon.
 

Sir Gordon

Decent User (I'm as good as you)
Reaction score
43
It is a very good and successfully helpful thing for the community. You are talented. Many new people will learn from this, and many old recruits will remember :)
 
S

Svegarn

Guest
Hey

I dont know if any1 have asked about this, so ill do it anyways:
I would like some help with an easy way to create a completely customized spell.
For example: Spells in DotA....
I know how to use triggers and such but i just havnt figured out how to make my own spells like i want them :/
Some detailed answers would be nice, thx!
 
General chit-chat
Help Users
  • No one is chatting at the moment.

      The Helper Discord

      Members online

      Affiliates

      Hive Workshop NUON Dome World Editor Tutorials

      Network Sponsors

      Apex Steel Pipe - Buys and sells Steel Pipe.
      Top