Skins - Advanced Skinning - Brushing

Andrewgosu

The Silent Pandaren Helper
Reaction score
716
Advanced skinning: Brushing


Introduction:
This tutorial is going to show you how to work with brushes and intruments in order to create an absolutely new skin for a model.

I am going to use Adode Photoshop, but this all is do-able with almost every more advanced image editing program. (Including GIMP)


So shall we begin?

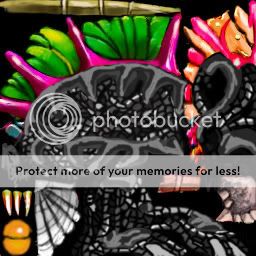
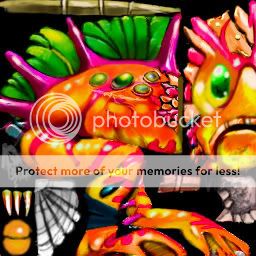
Open Image Extractor II or any other program, which allows you to export a Warcraft 3 skin from the mpq. I have chosen a Murloc to skin. The path for this specific Murloc is Units\Creeps\MurlocWarrior\Murlocwarrior.blp.
picture_1.jpg


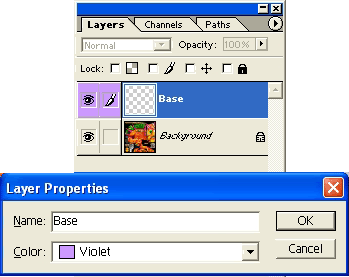
Start by making a new above the base image (Shift+ctrl+N) and naming it base.
base.gif


Press D to set the foreground colour to black and background colour to white. Now, pick the bursh tool (
brush.jpg
), the brush shouln’t be too big or too small, around 25 pixels is fine. Start making a base for the skin. Cover the body, the legs and the head. If you have gone over the edges slightly, don’t worry, let it be.

picture_2.jpg


After done that, create another layer and rename it to scales. Pick a darker gray colour and make a scale-pattern round the backside and onto the legs of the murloc. If done that, pick a lighter version of gray and inline the made brushing with that colour. Lastly, take a very light version of gray and make some edges between the darker and lighter ones.

picture_3.jpg


When finished with that, create another layer between the base and scales layer. (You can drag it there with your mouse)

Now, start creating a certain texture, using black and the shade tones of gray. Be creative. You can toggle on/off the base layer visibilty (
visi.jpg
) to check that you are keeping the original shape of the skin.

pic4.jpg


Now, create a new layer and call it skin. (Its up to you what you name them, if you do. The key thing is actually using alot of layer, so that if something goes wrong, the whole process isn’t lost). Press D to reset the colours. Pick a very small brush, sized, around 1.5 – 2.5 pixels. Start making a black scales. It should remind something like ring mail. Don’t make the scales too big. (The zoom tool (
zoom.jpg
) is your friend in these kind of situations)

picture_5.jpg


After that, create another layer, called upper skin. Drag it to the top, so the 3 other layers are below it. Pick a darking red tone of the forground and repeat the process above.
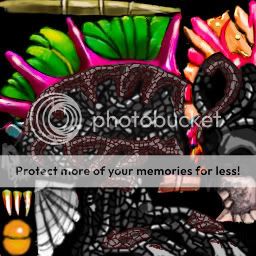
picture_6.jpg


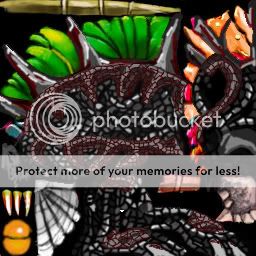
In total you should have 4 layers + the background layer. Make another one, below the upper skin but above the 3 other layers. Name it spikes. Finished that, start brushing some grayish spikes. I used red too, in addition to the gray tones.
fangs.jpg


The fact the original eye of the murloc is quite good, makes our life easier. Use the pen tool (
pen.jpg
) and select and paste it. It should create a new layer automatically, when you paste it. Rename it to eye and let it be on top of the other layers. After that, hue that to red. (Image>Adjust>Hue/Saturation).

Now you should be able to desaturate the eye-claps and the harpoons the murloc holds on his back, because the brushing is one the other layer. Select them and desaturate. (Image>Adjust>Desaturate). Also, make them darker by -40 to -70. (Image>Adjust>Brightness/Contrast) .
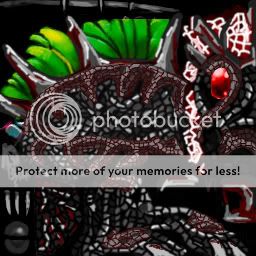
picture_8.jpg


After done that, and assured all is how you want, merge all the layer together. (But not the background, the original skin layer. Toggle the background visibility off, when merging)

Now, pick the burn tool (
burn.jpg
) and set the burn tool opacity from the upper menu to 50%. Start burning some of the lines (the body’s outline, some of the scales, spikes) darker. Use it moderately, not too much and not too randomly.

Duplicate the same layer and use Filter>Other>High Pass on it. Set the radius to 250. Now, set the duplicated layers’ blending mode to soft light. That makes the skin more sharper, without using the sharpen tool.

Meanwhile, I have covered the unbrushed parts of the head with shades of red and covered it with light scales. (Like we did with the body).
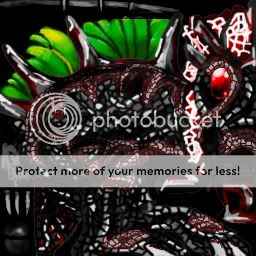
picture_10.jpg


As one can see, I have also brushed the wooden axe and the seashell to a shield and a metaly axe. (Doesn’t matter it didn’t come out very good, you can make it look 100x better.)

Now, if your skin looks almost the same as mine, all is done. But don’t run to save it yet! You have forgotten the alpha layer!

View the alpha layer. Channel>alpha layer. Pick white colour for your forground colour. This acts as an eraser in alpha layer. Delete the red alpha colour from the back part and from the legs. Now, press D to reset the colours. Black is used to alpha things out. Alpha out the green gimma-mam-bobs (Don’t know how to call them) between the spikes. After finished it, select a light gray colour for your foreground colour. As its between white and black, it doesn’t erase nor add alpha colour, but it lets the team colour in Warcraft to shine through, without getting those all-red-looking-and-squary-things. Now, having picked the gray colour, set the bursh size to very small again and brush some of the skin parts on the back of the murloc.

The alpha layer should look something like this, when finished.
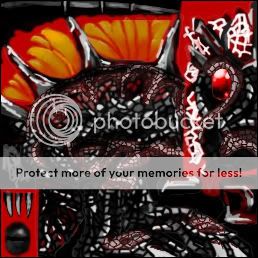
alpha.jpg


Now, you have reached to point, when it’s finally ready. Save it in TGA mode, 32 BIT and covert it back to .blp.

The original skin.

picture_1.jpg


The new skin.

picture_10.jpg


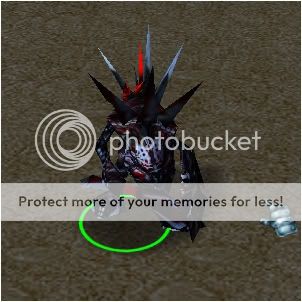
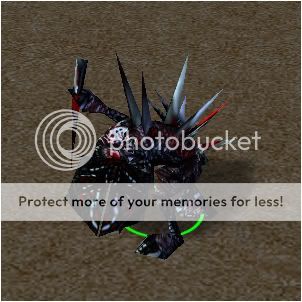
Ingame screenshots.

portrait.jpg


pic1.jpg


pic2.jpg
 

Quauhtli

I have the right to remain silent.
Reaction score
62
woooow nice!!!
+rep

if you want, you could put this skin on the bottem of ur tutorial and allow it to be dled... well your choice ofcourse:p
 

Andrewgosu

The Silent Pandaren Helper
Reaction score
716
Ah, yes. I was thinking, what I have forgotten. That was it.:rolleyes: Thanks.

Feedback is always appriciated.
 

Andrewgosu

The Silent Pandaren Helper
Reaction score
716
Thank you. Fixed some spelling mistakes and updated it little bit.

Edit: bump.
 

Blackveiled

Formerly, Ban-Lord
Reaction score
157
Nice. All I gotta say, such simple stuff and you can get amazing results.

+ Rep. Nice tut.

-ban-lord
 

Andrewgosu

The Silent Pandaren Helper
Reaction score
716
How are you meant to know what path the skin is when you import it after editing? What file do we save it as in the image extractor?

If you export it from mpq and the path is Units\Creeps\MurlocWarrior\Murlocwarrior.blp, you put the path Units\Creeps\MurlocWarrior\Murlocwarrior.blp when importing it back via import manager. The path remains the same. You save it .blp in image extractor.
 
G

Gordrid

Guest
If you export it from mpq and the path is Units\Creeps\MurlocWarrior\Murlocwarrior.blp, you put the path Units\Creeps\MurlocWarrior\Murlocwarrior.blp when importing it back via import manager. The path remains the same. You save it .blp in image extractor.

Ok, first off. Bravo. I read three of your guides, beginner and advanced and bravo. Very nice work.

However, I guess I'm still a bit ignorant to it because I was able to import the uncompressed blp file back in using the import manager. Then after scrolling through the addon to the thread I was able to find the above quote and tried it. It doesn't seem to be working though.

Specifically:
-I imported the blp.
-I put in the path (in import manager and then later in object editor) which is (units\human\HeroPaladin\HeroPaladin)

But when I go to see the finished work, the graphic remains the same and the little Head in the top left is a green screen....sometimes...other times its the character makeup sheet from the edit screen of GIMP. :/

Any thoughts would be appreciated.

Thanks.
 
G

Gordrid

Guest
wait a second....i think I might have had a revelation....and a 'doh!' at the same time.

When re-saving the blp with the Image Extractor and before importing with import manager, do you have to select the blp you are trying to overwrite?

(i.e., when I'm trying to overwrite the paladin.blp that came with teh program, I have to have it selected first?)

EDIT:

Ok I figured it out sort of. I was trying to apply the textures to the model to no avail. Obviously, because what you make in GIMP is for the icon and game interface screens. I got a model editor now and well...wish me luck because this looks ten times harder hehe.

Although, the icon and game interface still aren't loading properly. Any thoughts would be appreciated.
 
General chit-chat
Help Users
  • No one is chatting at the moment.
  • Ghan Ghan:
    Still lurking
    +3
  • The Helper The Helper:
    I am great and it is fantastic to see you my friend!
    +1
  • The Helper The Helper:
    If you are new to the site please check out the Recipe and Food Forum https://www.thehelper.net/forums/recipes-and-food.220/
  • Monovertex Monovertex:
    How come you're so into recipes lately? Never saw this much interest in this topic in the old days of TH.net
  • Monovertex Monovertex:
    Hmm, how do I change my signature?
  • tom_mai78101 tom_mai78101:
    Signatures can be edit in your account profile. As for the old stuffs, I'm thinking it's because Blizzard is now under Microsoft, and because of Microsoft Xbox going the way it is, it's dreadful.
  • The Helper The Helper:
    I am not big on the recipes I am just promoting them - I use the site as a practice place promoting stuff
    +2
  • Monovertex Monovertex:
    @tom_mai78101 I must be blind. If I go on my profile I don't see any area to edit the signature; If I go to account details (settings) I don't see any signature area either.
  • The Helper The Helper:
    You can get there if you click the bell icon (alerts) and choose preferences from the bottom, signature will be in the menu on the left there https://www.thehelper.net/account/preferences
  • The Helper The Helper:
    I think I need to split the Sci/Tech news forum into 2 one for Science and one for Tech but I am hating all the moving of posts I would have to do
  • The Helper The Helper:
    What is up Old Mountain Shadow?
  • The Helper The Helper:
    Happy Thursday!
    +1
  • Varine Varine:
    Crazy how much 3d printing has come in the last few years. Sad that it's not as easily modifiable though
  • Varine Varine:
    I bought an Ender 3 during the pandemic and tinkered with it all the time. Just bought a Sovol, not as easy. I'm trying to make it use a different nozzle because I have a fuck ton of Volcanos, and they use what is basically a modified volcano that is just a smidge longer, and almost every part on this thing needs to be redone to make it work
  • Varine Varine:
    Luckily I have a 3d printer for that, I guess. But it's ridiculous. The regular volcanos are 21mm, these Sovol versions are about 23.5mm
  • Varine Varine:
    So, 2.5mm longer. But the thing that measures the bed is about 1.5mm above the nozzle, so if I swap it with a volcano then I'm 1mm behind it. So cool, new bracket to swap that, but THEN the fan shroud to direct air at the part is ALSO going to be .5mm to low, and so I need to redo that, but by doing that it is a little bit off where it should be blowing and it's throwing it at the heating block instead of the part, and fuck man
  • Varine Varine:
    I didn't realize they designed this entire thing to NOT be modded. I would have just got a fucking Bambu if I knew that, the whole point was I could fuck with this. And no one else makes shit for Sovol so I have to go through them, and they have... interesting pricing models. So I have a new extruder altogether that I'm taking apart and going to just design a whole new one to use my nozzles. Dumb design.
  • Varine Varine:
    Can't just buy a new heatblock, you need to get a whole hotend - so block, heater cartridge, thermistor, heatbreak, and nozzle. And they put this fucking paste in there so I can't take the thermistor or cartridge out with any ease, that's 30 dollars. Or you can get the whole extrudor with the direct driver AND that heatblock for like 50, but you still can't get any of it to come apart
  • Varine Varine:
    Partsbuilt has individual parts I found but they're expensive. I think I can get bits swapped around and make this work with generic shit though
  • Ghan Ghan:
    Heard Houston got hit pretty bad by storms last night. Hope all is well with TH.
  • The Helper The Helper:
    Power back on finally - all is good here no damage
    +2
  • V-SNES V-SNES:
    Happy Friday!
    +1
  • The Helper The Helper:
    New recipe is another summer dessert Berry and Peach Cheesecake - https://www.thehelper.net/threads/recipe-berry-and-peach-cheesecake.194169/

      The Helper Discord

      Members online

      No members online now.

      Affiliates

      Hive Workshop NUON Dome World Editor Tutorials

      Network Sponsors

      Apex Steel Pipe - Buys and sells Steel Pipe.
      Top