Ryuu
I am back with Chocolate (:
- Reaction score
- 64
I assumed you already learnt how to build / create / make basic mazes. Now let's hop on to the more advanced topic!
MAZE LEVEL : EASY
1. Planning
Every creation of a maze requires planning. If not, you will be very confused!
Requirements: Pen, Pencil OR Excel OR Powerpoint
For this tutorial, I'll be using the Microsoft Excel. Why Excel? It is easy to use!
Firstly, open Excel.

In this tutorial, one coloured grid in Excel = one region.

Saw this toolbar? Click on the "Paint" like image (beside the big "A"). Use a dark colour to colour each grid.
Recommended colours: Black, Brown, Dark / Normal Blue, Dark / Normal Red, Orange, Dark Yellow, Not White!!
Got that? Now, we use the same colours in each two grids. Example:

Don't ask me why you should do that, you'll find it out later when we're doing the real thing
After planning, you can choose two options: save what you planned or just leave it open.
2. Region Creating
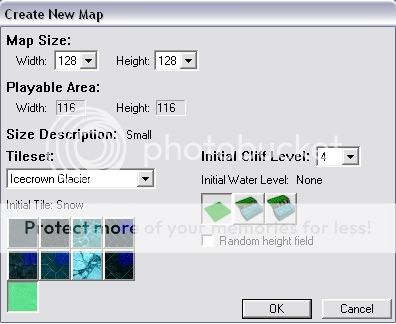
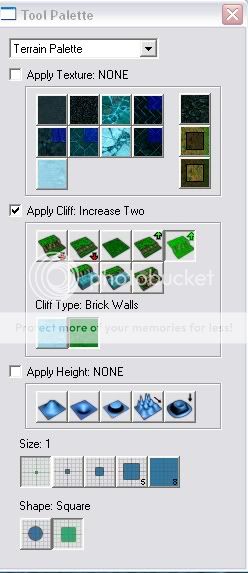
Either way, you still have to open your World Editor. Create a new map with size 64x64. You can also choose 32x32 for a much smaller map (optional). Choose your own tileset. Recomended cliff level should be 4. Do not check "Random height field" if you're building a very basic maze. Initial Water Value should be None.

After you've created your map, hit "C" on your map and scroll up and down and play with it ^^. Lols, let's just get back to work. If you've wondered why I asked you to colour two grids with the same colour in Excel, then you've reached the level high enough for you to know. If you've put your coloured grids ALL side by side, re-do it. Otherwise, follow what I did earlier on.
Now, I'll use my own excel planning for my own maze. For easier reference, I've copied my planning above and pasted it down here..
Alright, saw my black colour in the top-left grid? That will be the region "black1". So I'll create "black1" on the World Editor. Press "R" on your keyboard to open the Region Palette.

Saw that? My Region Palette still lacks as many as a few tens of regions. To create a region hit "Space Bar" on your keyboard and create a region. Then go to the Region Palette again and right-click on "Edit Region Propeties". Change the colour to what you did on your previous planning. You should have something like that:

Also, you should see my Region Palette. It is now filled with one region that you had just created. Do you have that result? Yes? Wow, you're not bad for a beginner! XD
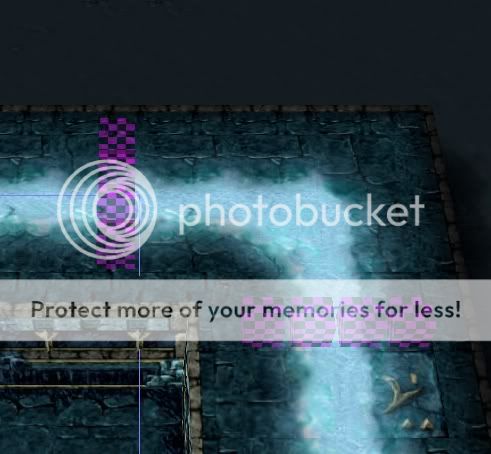
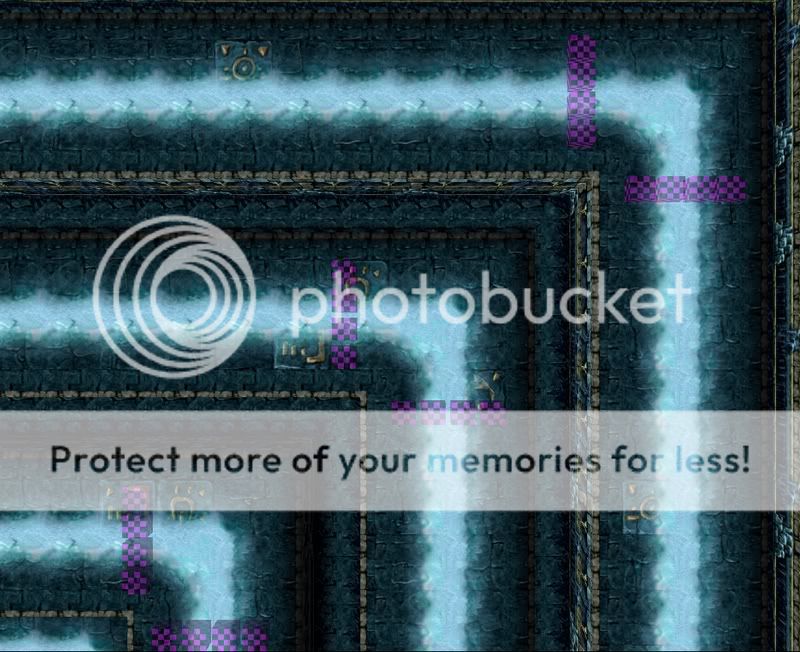
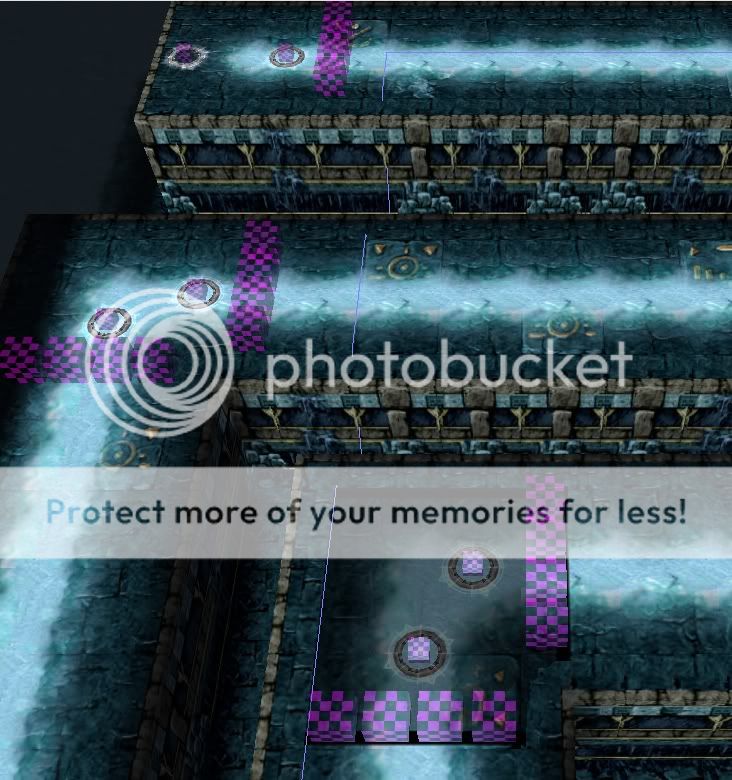
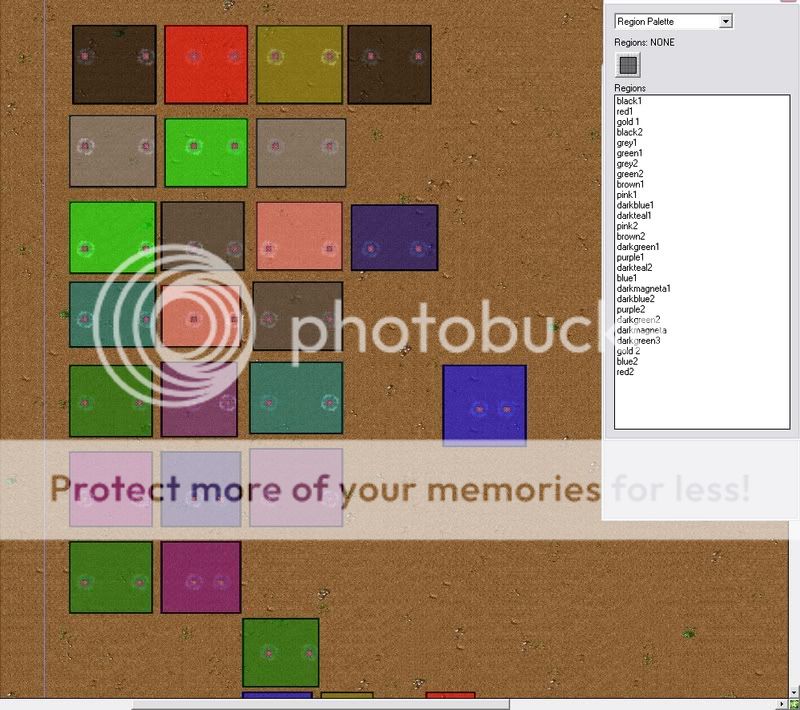
Do the same for ALL regions. Colour them, name them, place them, as you planned on your Excel. If your map is too big for all of the regions, you use some of the spaces to place shops like..??? (see bottom) OR, if you have a map that is too small for all fo the regions, you gotta create a new one ^^ So, colour all the regions just like you planned, name them, and also place them on the World Editor. You should have a result of:

Colourful right?
3. Placing Circles / Waygates
Now, time for you to place all the waygates into place with the regions you just created. HOWEVER, I do not recomend you using the "Waygate" model file. It is too big and takes up most space in the region. Use the "Circle of Power" model.
You have two options.
ONE, go to the Object Editor(F6) and click on "Waygate" which is under Neutral Passive > Melee > Buildings. Leave "Abilities" alone. Go to the model file and change it to "Circle of Power" found under Units. Find the "Art - Ground Texture" field and change it to NONE. We don't want any "building" texture in our Circle of Power model. Next, head on to the Collision Size (Under pathing - Collision Size) where you determine the size of the model. Change that to 10-15. Your choice ^^

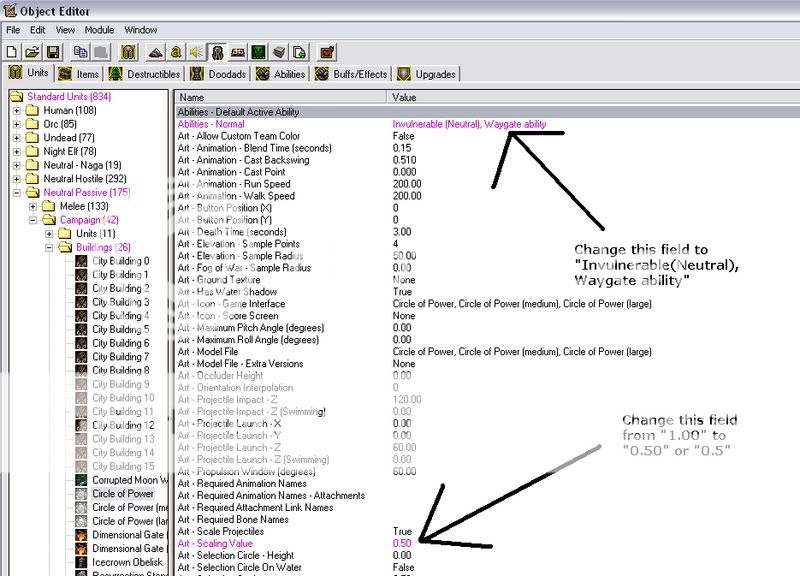
TWO, go to the Object Editor(F6) and click on "Circle of Power" which is under Neutral Passive > Campaign > Buildings. Change the "Abilities" field to "Invulnerable, Waygate Ability". Then, leave "Art - Ground Texture" alone. Then, you're done!

Well, I would reccomend option two, but one would work as well ^^
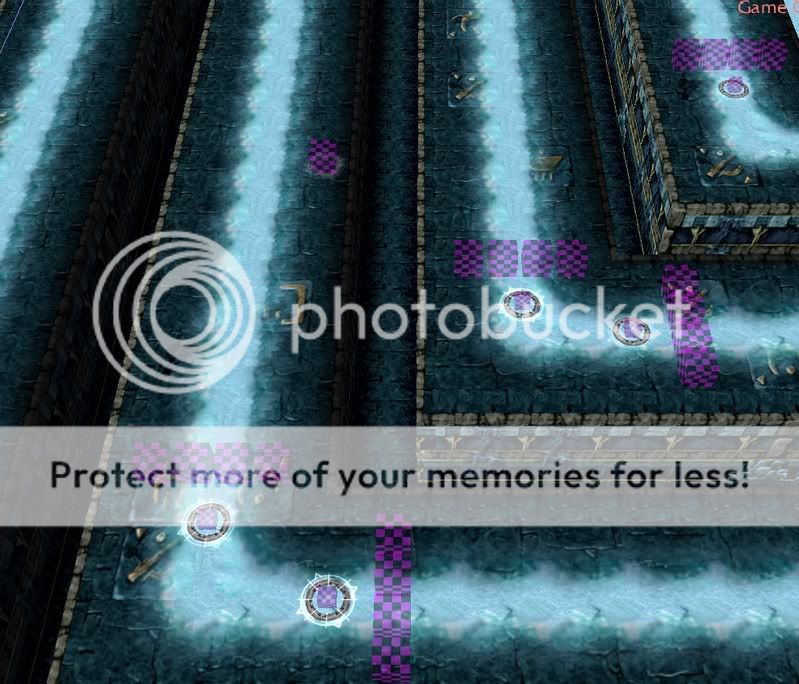
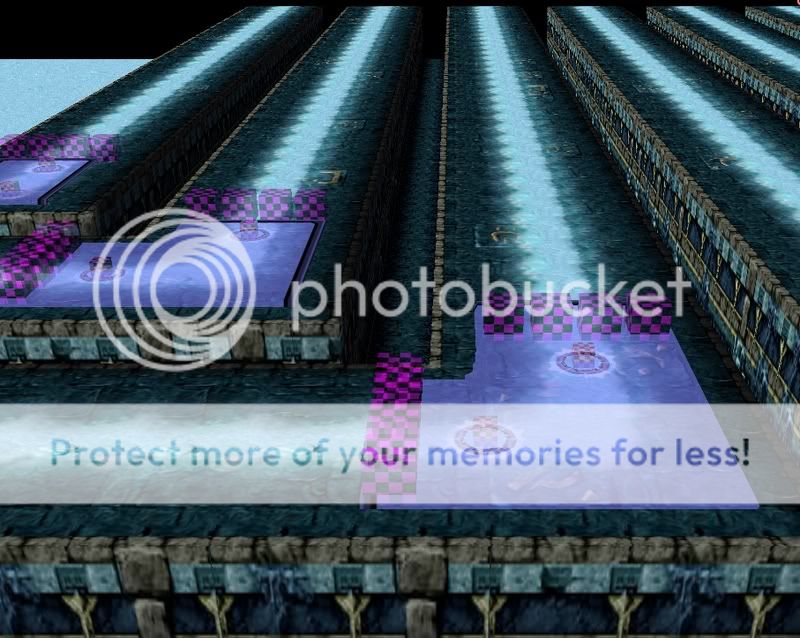
Now, let's get back on track. Go back to your terrain Editor and hit "U" on your keyboard. Shortly after, your Unit Palette will appear. Go to Neutral Passive > Campaign > Buildings and click on Circle of Power (I'm using Circle of power for this tutorial). Next, place it in each of your regions. I'm pretty sure you wouldn't know how to view the regions while placing the units, but some of you may know. To view regions while having region palette closed, just hit the View menu, and one of the options is Regions. So now, Place two of your circles in your regions. Then, continue to place circles in all of your created regions. One by one. Then, you should achieve the result:
4. Giving Circles / Waygates a Region for units to teleport to
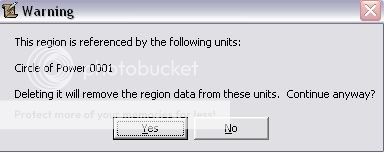
After placing the circles or waygates in your map, its time for the hard part - giving circles or waygates a region for units to teleport to. You see, they need a circle or a waygate, with a region, for them to teleport to. To do this we start by X-ing the Region Palette (
 ). We don't need that now. Next, double-click on your very first Waygate, or circle (the topleft one). You'll see this window:
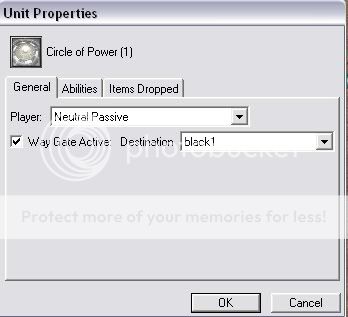
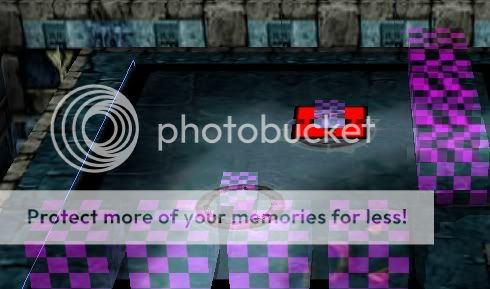
Got that right? Now, just like my image, check "Way Gate Active". Choose the region that it is supposed to teleport to. For example, the waygate in region "black1" will teleport to region "black2". Next, choose the other circle or waygate in the region, and just like the previous one, check "Way Gate Active". For this one, choose a random region so that players won't know where they're going, making it more challenging. Continue with all the other waygates or circles, following this formula : left circle, next colour region or previous colour region.... right circle, random region. Or, to make it much more challenging, use this formula "left circle, random region OR next colour region OR previous colour region.... right circle, random region ONLY". Once you got that done, you only have one thing left... the endpoint. To set the endpoint you'll have to mark that with something... we'll see that later.
5. Terraining - Start Locations - Ending Locations - Etc.
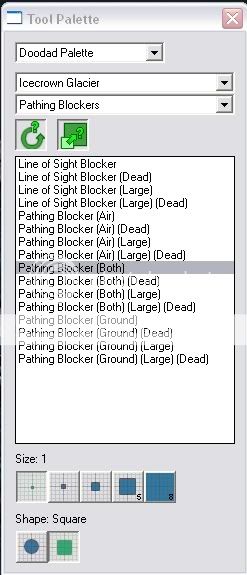
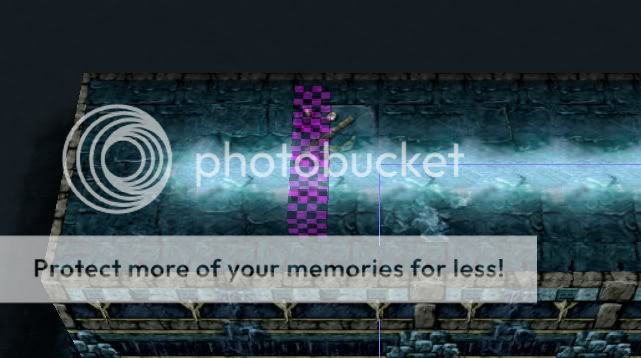
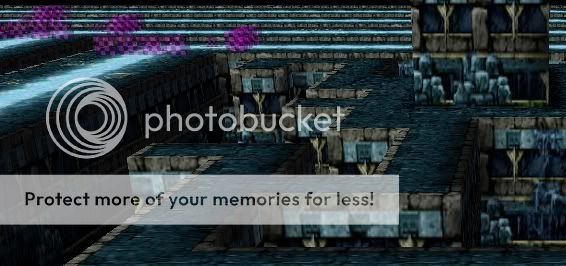
This will be a fast topic. No images, sorry =[ okay, lets begin. Set all players' start locations at the starting point, and build boundaries ( all cliffs or doodads or pathing blockers ) to seperate all of the regions. That's the end of the topic, LOLS!
6a. Triggers
Triggers are, the most difficult part in anyone's world editor journey. Alright, let's get started.
Yup, we're going into that now. Let's begin!
The events make sure that whenever the unit enters YourEndPointHere as a region, it'll function all the actions being created.
These conditions ensure that only the 8 players can function the actions
This trigger states the text "<Name> has entered the Endpoint! The game will now end" in yellow colour.
This trigger function so that the owner of the entering unit wins the game.
6b. Triggers
Triggers are, the most difficult part in anyone's world editor journey. Alright, let's get started.
In this tutorial, triggers are only to create the units for movement.
Variables Required
temp_point : Point Variable
This code actually sets the time to 0.00 so that whatever that is in the "Actions" section can be functioned.
There are no conditions.
These triggers actually checks whether is the player controlled by a user, and whether is it in game.
After checking whether is the player online, it creates a "mazer" for the player to complete the maze.
If the player is not online, it does nothing to it. Then, it goes on to the next player and the loop begins again.
Then, after creating all the builders for the online players, it removes the temp_point location so that it doesn't leaks.
So, your main trigger should be:
And you're done!
7. Tips on Improving on a Maze
Let's get started.
1. "Mazes will look unfinished WITHOUT secret speed items and secret creeps." To do that, you'll have to use the event "every ?? seconds of the game" and use the actions "create (item)" for items and "create (creeps)" for creeps.
2. "Mazes will look finished, but in actual fact it is NOT without the shops for buying speed items." To do that, create a shop and use it sell items. WARNING: Create your shop at the starting location and at the middle location!!!
3. "Mazes cannot be survived without the "Revive System"." Easy! We'll have to use the event "a unit dies" so that whenever a unit dies, it'll check the condition "dying unit equals to a hero" then run the action "revive hero instantly".
And now, you're really done!
I hope you understand this tutorial. Although EVERYTHING isn't shown here, you should be able to do something out of it.
Stay tuned for Part Two and Three. ^^
PART ONE
Advanced Maze I
Advanced Maze I
MAZE LEVEL : EASY
1. Planning
Every creation of a maze requires planning. If not, you will be very confused!
Requirements: Pen, Pencil OR Excel OR Powerpoint
For this tutorial, I'll be using the Microsoft Excel. Why Excel? It is easy to use!
Firstly, open Excel.
In this tutorial, one coloured grid in Excel = one region.
Saw this toolbar? Click on the "Paint" like image (beside the big "A"). Use a dark colour to colour each grid.
Recommended colours: Black, Brown, Dark / Normal Blue, Dark / Normal Red, Orange, Dark Yellow, Not White!!
Got that? Now, we use the same colours in each two grids. Example:
Don't ask me why you should do that, you'll find it out later when we're doing the real thing
After planning, you can choose two options: save what you planned or just leave it open.
2. Region Creating
Either way, you still have to open your World Editor. Create a new map with size 64x64. You can also choose 32x32 for a much smaller map (optional). Choose your own tileset. Recomended cliff level should be 4. Do not check "Random height field" if you're building a very basic maze. Initial Water Value should be None.
After you've created your map, hit "C" on your map and scroll up and down and play with it ^^. Lols, let's just get back to work. If you've wondered why I asked you to colour two grids with the same colour in Excel, then you've reached the level high enough for you to know. If you've put your coloured grids ALL side by side, re-do it. Otherwise, follow what I did earlier on.
Now, I'll use my own excel planning for my own maze. For easier reference, I've copied my planning above and pasted it down here..
Alright, saw my black colour in the top-left grid? That will be the region "black1". So I'll create "black1" on the World Editor. Press "R" on your keyboard to open the Region Palette.
Saw that? My Region Palette still lacks as many as a few tens of regions. To create a region hit "Space Bar" on your keyboard and create a region. Then go to the Region Palette again and right-click on "Edit Region Propeties". Change the colour to what you did on your previous planning. You should have something like that:
Also, you should see my Region Palette. It is now filled with one region that you had just created. Do you have that result? Yes? Wow, you're not bad for a beginner! XD
Do the same for ALL regions. Colour them, name them, place them, as you planned on your Excel. If your map is too big for all of the regions, you use some of the spaces to place shops like..??? (see bottom) OR, if you have a map that is too small for all fo the regions, you gotta create a new one ^^ So, colour all the regions just like you planned, name them, and also place them on the World Editor. You should have a result of:
Colourful right?
3. Placing Circles / Waygates
Now, time for you to place all the waygates into place with the regions you just created. HOWEVER, I do not recomend you using the "Waygate" model file. It is too big and takes up most space in the region. Use the "Circle of Power" model.
You have two options.
ONE, go to the Object Editor(F6) and click on "Waygate" which is under Neutral Passive > Melee > Buildings. Leave "Abilities" alone. Go to the model file and change it to "Circle of Power" found under Units. Find the "Art - Ground Texture" field and change it to NONE. We don't want any "building" texture in our Circle of Power model. Next, head on to the Collision Size (Under pathing - Collision Size) where you determine the size of the model. Change that to 10-15. Your choice ^^
TWO, go to the Object Editor(F6) and click on "Circle of Power" which is under Neutral Passive > Campaign > Buildings. Change the "Abilities" field to "Invulnerable, Waygate Ability". Then, leave "Art - Ground Texture" alone. Then, you're done!
Well, I would reccomend option two, but one would work as well ^^
Now, let's get back on track. Go back to your terrain Editor and hit "U" on your keyboard. Shortly after, your Unit Palette will appear. Go to Neutral Passive > Campaign > Buildings and click on Circle of Power (I'm using Circle of power for this tutorial). Next, place it in each of your regions. I'm pretty sure you wouldn't know how to view the regions while placing the units, but some of you may know. To view regions while having region palette closed, just hit the View menu, and one of the options is Regions. So now, Place two of your circles in your regions. Then, continue to place circles in all of your created regions. One by one. Then, you should achieve the result:
4. Giving Circles / Waygates a Region for units to teleport to
After placing the circles or waygates in your map, its time for the hard part - giving circles or waygates a region for units to teleport to. You see, they need a circle or a waygate, with a region, for them to teleport to. To do this we start by X-ing the Region Palette (
Got that right? Now, just like my image, check "Way Gate Active". Choose the region that it is supposed to teleport to. For example, the waygate in region "black1" will teleport to region "black2". Next, choose the other circle or waygate in the region, and just like the previous one, check "Way Gate Active". For this one, choose a random region so that players won't know where they're going, making it more challenging. Continue with all the other waygates or circles, following this formula : left circle, next colour region or previous colour region.... right circle, random region. Or, to make it much more challenging, use this formula "left circle, random region OR next colour region OR previous colour region.... right circle, random region ONLY". Once you got that done, you only have one thing left... the endpoint. To set the endpoint you'll have to mark that with something... we'll see that later.
5. Terraining - Start Locations - Ending Locations - Etc.
This will be a fast topic. No images, sorry =[ okay, lets begin. Set all players' start locations at the starting point, and build boundaries ( all cliffs or doodads or pathing blockers ) to seperate all of the regions. That's the end of the topic, LOLS!
6a. Triggers
Triggers are, the most difficult part in anyone's world editor journey. Alright, let's get started.
Ryuu said:To set the endpoint you'll have to mark that with something... we'll see that later.
Yup, we're going into that now. Let's begin!
Code:
Endpoint Trigger
   EVENTS
      Unit - A unit enters YourEndPointHere <gen>
The events make sure that whenever the unit enters YourEndPointHere as a region, it'll function all the actions being created.
Code:
   CONDITIONS
      Or- Multiple Conditions
         (Owner of (Entering Unit)) Equals to Player 1 (Red)
         (Owner of (Entering Unit)) Equals to Player 2 (Blue)
         (Owner of (Entering Unit)) Equals to Player 3 (Teal)
         (Owner of (Entering Unit)) Equals to Player 4 (Purple)
         (Owner of (Entering Unit)) Equals to Player 5 (Yellow)
         (Owner of (Entering Unit)) Equals to Player 6 (Orange)
         (Owner of (Entering Unit)) Equals to Player 7 (Green)
         (Owner of (Entering Unit)) Equals to Player 8 (Pink)
These conditions ensure that only the 8 players can function the actions
Code:
   ACTIONS
      Game - Display to (All Players) the text: [B]|cffffcc00[/B](Name of (Owner of (Entering Unit))) + has entered the Endpoint! The game will now end. [B]|r[/B]
This trigger states the text "<Name> has entered the Endpoint! The game will now end" in yellow colour.
Code:
   ACTIONS
      Game - Victory (Owner of (Entering Unit))
This trigger function so that the owner of the entering unit wins the game.
6b. Triggers
Triggers are, the most difficult part in anyone's world editor journey. Alright, let's get started.
In this tutorial, triggers are only to create the units for movement.
Variables Required
temp_point : Point Variable
Code:
Creating Units
   EVENTS
      Time - Elapsed time is 0.00 seconds
This code actually sets the time to 0.00 so that whatever that is in the "Actions" section can be functioned.
Code:
   CONDITIONS
      None T_T
There are no conditions.
Code:
   ACTIONS
      Set temp_point = ((Picked player) start location)
      Player Group - Pick every player in (All Players) and do (Actions)
         Loop - Actions
            If (All Conditions are True) then do (Then Actions) else do (Else Actions)
               If - Conditions
                  (Picked Player) controller Equal to User
                  (Picked Player) slot status Equal to Is Playing
These triggers actually checks whether is the player controlled by a user, and whether is it in game.
Code:
               Then - Actions
                  Unit - Create 1 Mazer for (Picked Player) at temp_point facing Default Building facing degrees
After checking whether is the player online, it creates a "mazer" for the player to complete the maze.
Code:
               Else - Actions
                  Do Nothing
If the player is not online, it does nothing to it. Then, it goes on to the next player and the loop begins again.
Code:
Custom Script: call RemoveLocation (udg_temp_ponit)Then, after creating all the builders for the online players, it removes the temp_point location so that it doesn't leaks.
So, your main trigger should be:
Code:
Creating Mazers
   EVENTS
      Time - Time Elapsed is 0.00 seconds
   CONDITIONS
   ACTIONS
      Set temp_point = ((Picked player) start location)
      Player Group - Pick every player in (All players) and do (Actions)
         Loop - Actions
            If (All Conditions are True) then do (Then Actions) else do (Else Actions)
               If - Conditions
                  (Picked player) controller Equal to User
                  (Picked player) slot status Equal to Is Playing
               Then - Actions
                  Unit - Create 1 Mazer for (Picked Player) at temp_point facing Default building facing degrees
               Else - Actions
                   Do nothing
      Custom script:     call RemoveLocation (udg_temp_point)
And you're done!
7. Tips on Improving on a Maze
- Mazes will look unfinished WITHOUT secret speed items and secret creeps.
- Mazes will look finished, but in actual fact it is NOT without the shops for buying speed items.
- Mazes cannot be survived without the "Revive System".
Let's get started.
1. "Mazes will look unfinished WITHOUT secret speed items and secret creeps." To do that, you'll have to use the event "every ?? seconds of the game" and use the actions "create (item)" for items and "create (creeps)" for creeps.
Code:
Secret Trigger
   EVENTS
      Every (Random real number from 0.00 to 60.00) seconds of the game
   CONDITIONS
   ACTIONS
      Item - Create (Item) in (Region)
      Unit - Create (Creep) for Player 12 (Brown) in (Region) facing Default building facing degrees
2. "Mazes will look finished, but in actual fact it is NOT without the shops for buying speed items." To do that, create a shop and use it sell items. WARNING: Create your shop at the starting location and at the middle location!!!
3. "Mazes cannot be survived without the "Revive System"." Easy! We'll have to use the event "a unit dies" so that whenever a unit dies, it'll check the condition "dying unit equals to a hero" then run the action "revive hero instantly".
Code:
Revive System
   EVENTS
      Unit - A unit Dies
   CONDITIONS
      ((Dying Unit) is a hero) Equals to True
   ACTIONS
      Hero - Revive Hero Instantly at temp_point
And now, you're really done!
I hope you understand this tutorial. Although EVERYTHING isn't shown here, you should be able to do something out of it.
Stay tuned for Part Two and Three. ^^