Rheias
New Helper (I got over 2000 posts)
- Reaction score
- 232
Making signatures the easy way
This tutorial will teach how to easily make a signature, before getting to know all of Photoshop’s filters. You can consider it kind of a guide for you to create your first few signatures, before going into the advanced stuff. While following this tutorial you’ll learn to do things on your own, as in a few steps you’ll need to figure out alone what to do, but still, you’ll be directed through the whole process.
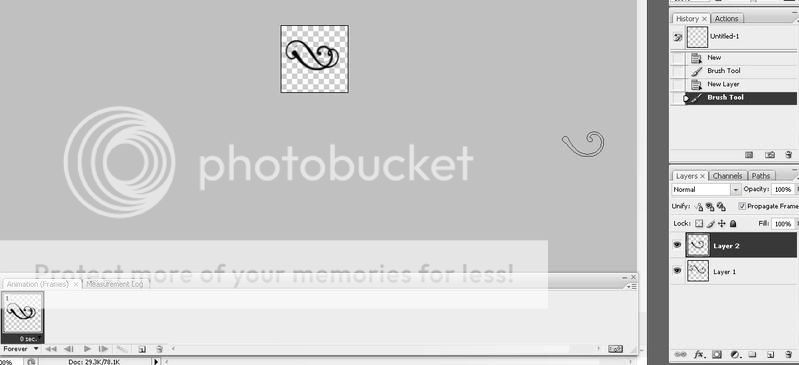
Step 1: Create a new document (ctrl+n) I like my signatures to be around the size of 400x120. After that, pick a render, and by using the move tool, move it to your sig. You may want to resize it as well. I like my renders to be located around the middle of the signature.

Step 2: Now create the background color, it should probably the general render’s color, or a mix of two or more if you would like to use gradient (one light, one dark). I suggest using the eyedropper tool.

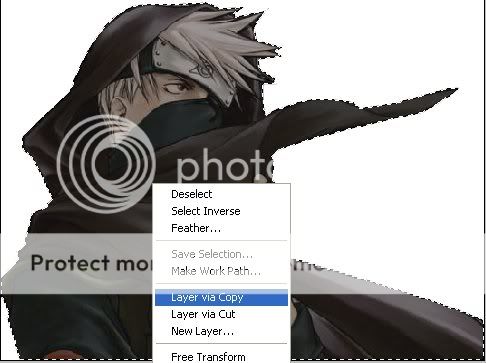
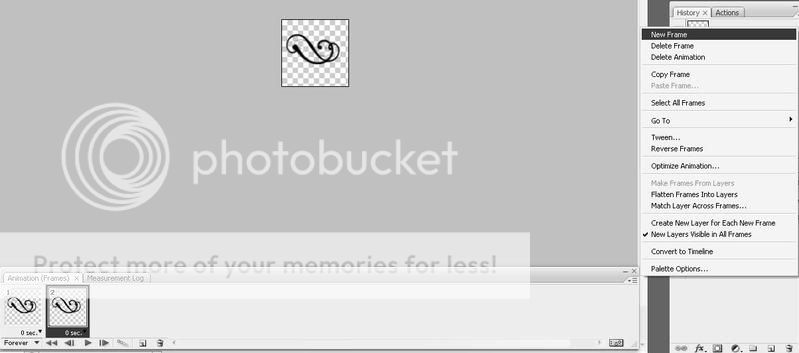
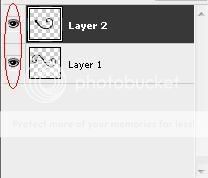
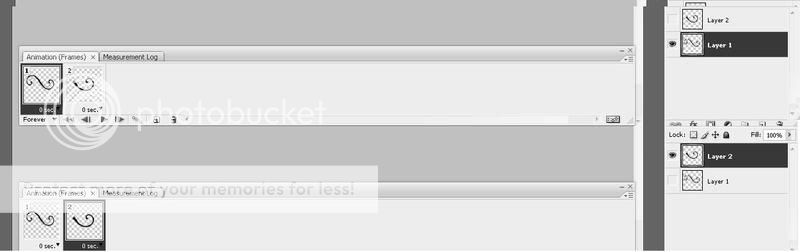
Step 3: Now we want to prepare to the smudging step. Duplicate your render’s layer one or two times. If you duplicated it once then do nothing, else, in each new layer move the render to a different location and then merge the two. You can merge them by hiding all other layers and then pressing on Ctrl+Shift+E. Make sure you still got the original render layer.
Step 4: Now start smudging the duplicate until it looks nice. I like to use the smudging tool with 40% - 60% strength. Once you are done place the smudged layer under the render’s.

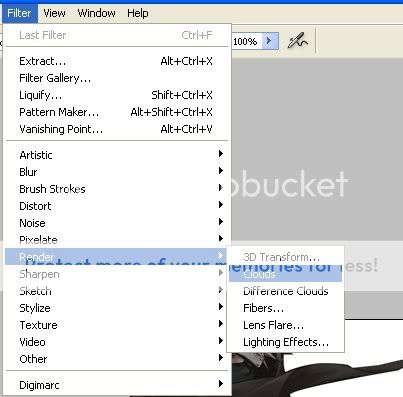
Step 5: Now, play a bit with the smudged layer. Change opacity, add a few filters (such as ocean ripple, for example) be creative! Also, in order to make the signature blend better, you may want to erase the render, with a low opacity.

Step 6: Now, I suggest going back to the second layer, the one that with the background color, and changing the color a bit until it suits your smudging the best. This step is optional.

Step 7: Add a bit c4ds to make the signature looks more interesting.

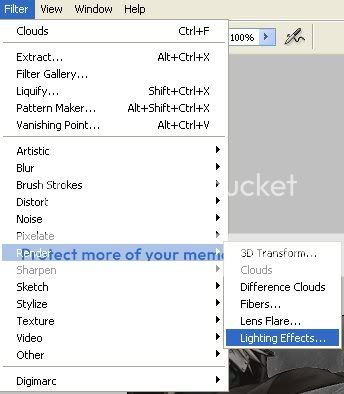
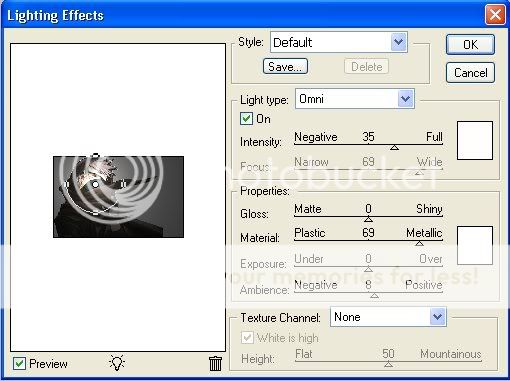
Step 8: If you are a bit familiared with Photoshop you can add a few gradient maps and photofilters.

Step 9: This one is optional as well. If you wish you can add text to your signature.

Step 10: Add a border if you wish.
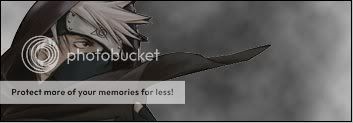
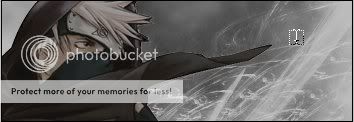
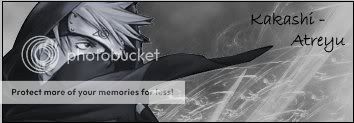
Final product:

This tutorial will teach how to easily make a signature, before getting to know all of Photoshop’s filters. You can consider it kind of a guide for you to create your first few signatures, before going into the advanced stuff. While following this tutorial you’ll learn to do things on your own, as in a few steps you’ll need to figure out alone what to do, but still, you’ll be directed through the whole process.
Step 1: Create a new document (ctrl+n) I like my signatures to be around the size of 400x120. After that, pick a render, and by using the move tool, move it to your sig. You may want to resize it as well. I like my renders to be located around the middle of the signature.
Step 2: Now create the background color, it should probably the general render’s color, or a mix of two or more if you would like to use gradient (one light, one dark). I suggest using the eyedropper tool.
Step 3: Now we want to prepare to the smudging step. Duplicate your render’s layer one or two times. If you duplicated it once then do nothing, else, in each new layer move the render to a different location and then merge the two. You can merge them by hiding all other layers and then pressing on Ctrl+Shift+E. Make sure you still got the original render layer.
Step 4: Now start smudging the duplicate until it looks nice. I like to use the smudging tool with 40% - 60% strength. Once you are done place the smudged layer under the render’s.
Step 5: Now, play a bit with the smudged layer. Change opacity, add a few filters (such as ocean ripple, for example) be creative! Also, in order to make the signature blend better, you may want to erase the render, with a low opacity.
Step 6: Now, I suggest going back to the second layer, the one that with the background color, and changing the color a bit until it suits your smudging the best. This step is optional.
Step 7: Add a bit c4ds to make the signature looks more interesting.
Step 8: If you are a bit familiared with Photoshop you can add a few gradient maps and photofilters.
Step 9: This one is optional as well. If you wish you can add text to your signature.
Step 10: Add a border if you wish.
Final product:

 )
)