
Extremedesyr
New Member
- Reaction score
- 6
Hey, I have been trying to modify my own UI lately and I noticed that while following some tutorials, I couldn't see my UI, so I tought: This is either my problem or the tutorial doesnt work. So, now that I have found out how to modify Warcraft 3's UI (I'm talking about TFT, I dont know if this is possible in ROC), I was hoping that other people would like to learn it aswell, since right now not so many people are using custom UI in their maps, that is probably because it is not recommended to use custom UI on battle.net since it costs alot of file space.
now take a deep breath so that we can start.
Now what I am going to teach you is how to modify basic stuff, the transport slot of a vehicle with cargo hold, in this case, for example a transport ship.
2. Saving our UI Preset with Wc3 Image Extractor II
so for this tutorial, I will teach you how to modify a transport slot. It is indeed a very basic item, but the point is that after this tutorial you should be able to make your very own UI, since all UI is basically modified and imported in the same way.
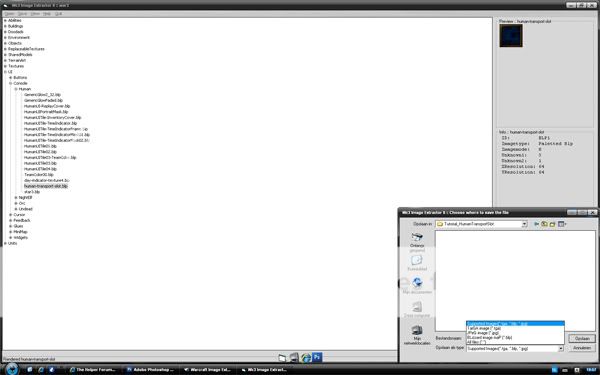
So the first thing you wanna do is open up the Wc3 Image Extractor II, go to Open > Archieve (MPQ) and open up Wc3x.mpq. now you should get a list in your image extractor, go to UI > Console > Human > human-transport-slot.blp
now select that file and go to save > image, doesnt matter where you save it, but make sure you save it as a TGA file.
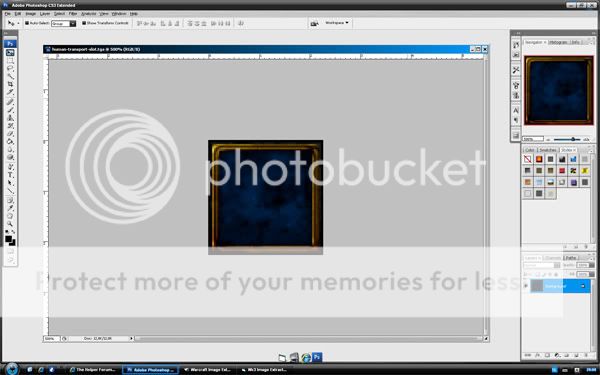
Now open up Photoshop, and open the TGA File you just saved.
you can zoom into the picture as far as u want, just remember that if you zoom in, that the resolution ratio is not the same as when you see it in-game, so if you find your image not sharp enough, make sure to zoom out before getting too critical about it.
For this tutorial I suggest that you dont get too creative just yet, not until you know the basics of modifying UI.
so what I am going to do, is take an image from the internet (doesnt matter which image, make it fit your theme. If you use a random image I'd suggest that you inform the maker of this image, It might be copyrighted)
The image im using for this tutorial:

you could allso make your own icon and fit it into the image, for that I'd suggest you read this tutorial.
now, to fit the image into the UI, copy it, and paste it onto your UI, remove all the stuff you dont want with the magic wand tool, the ereaser tool or the marquee tool. what ive got now is this:

You might aswell want to change the colour of the box, and give your image some shadow and detail. Since this fits in my map, I will use red to colour my box, to do this I am using the brush tool, with a size of 4, and opacity on 15%, make sure that you dont color the black, because you will see that in-game. Make sure you have the background layer selected for coloring the box. I used colour a01515 for my red, you want to use pure black for shadows, and maybe also sharpen it once (Stylize > Sharpen > Sharpen)
my icon looks like this:

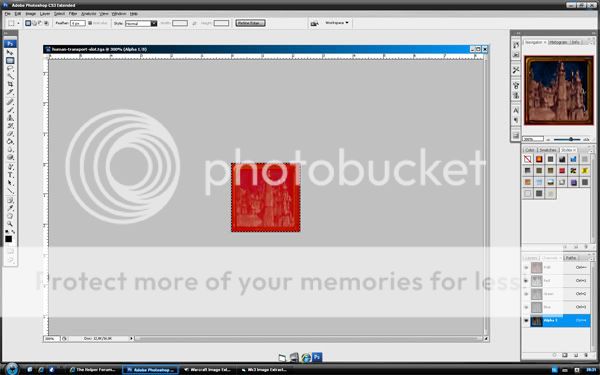
Now, for the tutorial let's say im finished, now we want to set the alpha channel, this is VERY important, or your UI will be invisible or green.
to do this, first make sure you have only 1 layer, to combine layers select all layers and press <Ctrl + E>, now use the marquee tool to copy the whole UI, with <Ctrl + C>. when this is done, select channels in the lower right corner of your screen, and select the alpha 1 channel, if this does not exist press 'new channel' and type Alpha 1, now, with the Alpha 1 channel everything is black, because it is empty, paste your UI into this channel with <Ctrl + V> (now it will be black - white), now make all channels visible while having the Alpha 1 channel still selected, this should look like this:
now, with Alpha 1 still selected, go to File > Save As and make sure you save the file as TGA. where you save this doesnt matter. uncheck Compress RLE and use 32 bit.
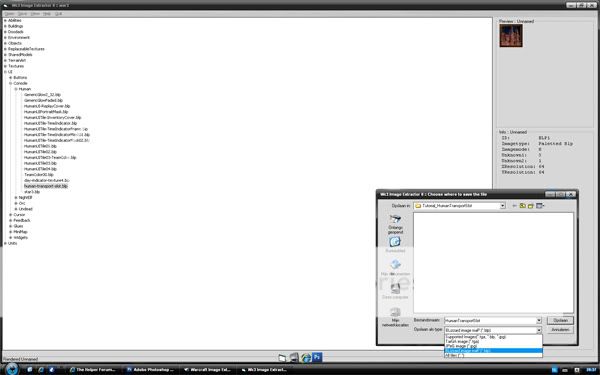
go to Open > Image and open the file you just saved in photoshop. now, with this image selected, go to Save > Image and make sure you save it as a BLP file now. for the quality, I suggest that you use 75, the low quality will make it look low-res and the high quality will greatly increase your map's file size.
this should look like this:
again, where you save it doesnt matter.
now, finally, Importing.
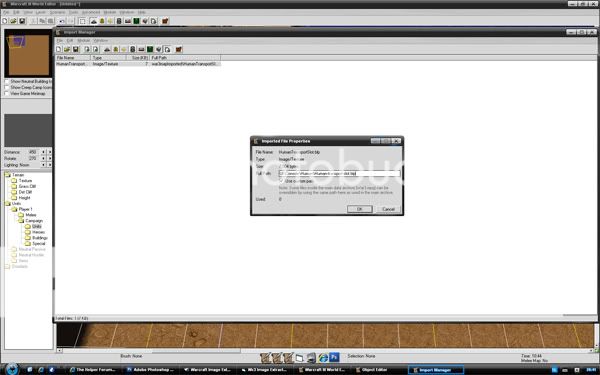
open your Wc3 TFT map, and go to import manager (F12 or Module > Import Manager) and import our .BLP file, make sure that you set the right path to: UI\Widgets\Console\Human\human-transport-slot.blp, looks like this:
now as you go ingame you should be able to see it. Have fun making your own UI!
Other tuts you might want to see:
Basics of UI
change the Hero XP bar
and as I had linked earlier: about icons
feel free to comment, don't forget that this is a basic tutorial, it will work for most UI
for any questions about UI feel free to ask
sorry for not adding a screenshot for my final ingame result but on the screenshot you couldn't see it (worked perfect in-game)
now before we start you will need to have these tools:
Photoshop is what I used, but any other program that works with alpha layers and can open and save TGA format files should work.
Wc3 Image Extractor II, a useful tool that can open the Wc3 archieve and extract icons, skins and UI.
And ofcourse Warcraft 3 (TFT?) and some basic knowledge.
1. What is UI
2. Saving our UI Preset with Wc3 Image Extractor II
3. Modifying our UI in Photoshop
4. Saving, opening, saving and importing our UI
now take a deep breath so that we can start.
1. What is UI
In this tutorial I will teach you how to modify warcraft 3's UI, the UI is the game interface, meaning the interface that surrounds your screen, including the XP bar, portrait, and all that stuff.Now what I am going to teach you is how to modify basic stuff, the transport slot of a vehicle with cargo hold, in this case, for example a transport ship.
2. Saving our UI Preset with Wc3 Image Extractor II
so for this tutorial, I will teach you how to modify a transport slot. It is indeed a very basic item, but the point is that after this tutorial you should be able to make your very own UI, since all UI is basically modified and imported in the same way.
So the first thing you wanna do is open up the Wc3 Image Extractor II, go to Open > Archieve (MPQ) and open up Wc3x.mpq. now you should get a list in your image extractor, go to UI > Console > Human > human-transport-slot.blp
now select that file and go to save > image, doesnt matter where you save it, but make sure you save it as a TGA file.
Now open up Photoshop, and open the TGA File you just saved.
you can zoom into the picture as far as u want, just remember that if you zoom in, that the resolution ratio is not the same as when you see it in-game, so if you find your image not sharp enough, make sure to zoom out before getting too critical about it.
3. Modifying our UI in Photoshop
Now comes the fun part, where you can decide to make whatever you want, as long as it is a box. remember that the icon of the unit that is in the transport has to fit onto your box.
For this tutorial I suggest that you dont get too creative just yet, not until you know the basics of modifying UI.
so what I am going to do, is take an image from the internet (doesnt matter which image, make it fit your theme. If you use a random image I'd suggest that you inform the maker of this image, It might be copyrighted)
The image im using for this tutorial:
you could allso make your own icon and fit it into the image, for that I'd suggest you read this tutorial.
now, to fit the image into the UI, copy it, and paste it onto your UI, remove all the stuff you dont want with the magic wand tool, the ereaser tool or the marquee tool. what ive got now is this:
!Keep in mind that in-game the image is small!
You might aswell want to change the colour of the box, and give your image some shadow and detail. Since this fits in my map, I will use red to colour my box, to do this I am using the brush tool, with a size of 4, and opacity on 15%, make sure that you dont color the black, because you will see that in-game. Make sure you have the background layer selected for coloring the box. I used colour a01515 for my red, you want to use pure black for shadows, and maybe also sharpen it once (Stylize > Sharpen > Sharpen)
my icon looks like this:
Now, for the tutorial let's say im finished, now we want to set the alpha channel, this is VERY important, or your UI will be invisible or green.
to do this, first make sure you have only 1 layer, to combine layers select all layers and press <Ctrl + E>, now use the marquee tool to copy the whole UI, with <Ctrl + C>. when this is done, select channels in the lower right corner of your screen, and select the alpha 1 channel, if this does not exist press 'new channel' and type Alpha 1, now, with the Alpha 1 channel everything is black, because it is empty, paste your UI into this channel with <Ctrl + V> (now it will be black - white), now make all channels visible while having the Alpha 1 channel still selected, this should look like this:
now, with Alpha 1 still selected, go to File > Save As and make sure you save the file as TGA. where you save this doesnt matter. uncheck Compress RLE and use 32 bit.
4. Saving, opening, saving and importing our UI
close photoshop, and open Wc3 Image extractor II again.go to Open > Image and open the file you just saved in photoshop. now, with this image selected, go to Save > Image and make sure you save it as a BLP file now. for the quality, I suggest that you use 75, the low quality will make it look low-res and the high quality will greatly increase your map's file size.
this should look like this:
again, where you save it doesnt matter.
now, finally, Importing.
open your Wc3 TFT map, and go to import manager (F12 or Module > Import Manager) and import our .BLP file, make sure that you set the right path to: UI\Widgets\Console\Human\human-transport-slot.blp, looks like this:
now as you go ingame you should be able to see it. Have fun making your own UI!
Other tuts you might want to see:
Basics of UI
change the Hero XP bar
and as I had linked earlier: about icons
feel free to comment, don't forget that this is a basic tutorial, it will work for most UI
for any questions about UI feel free to ask
sorry for not adding a screenshot for my final ingame result but on the screenshot you couldn't see it (worked perfect in-game)
")

