
T.s.e
Wish I was old and a little sentimental
- Reaction score
- 133
Adding Portraits to Models Without Them
We've all been there. You want to use a model for a unit, preferably some flashy special effect that can move about and be selected. This unit is vital to your map, and it having a portrait is crucial for the good-lookingness of the map as a whole. Then you discover that the model's portrait is all messed up. Sometimes it views the model from an extreme close-up, sometimes the view only flashes, and sometimes it doesn't even view the model. What can be done?!
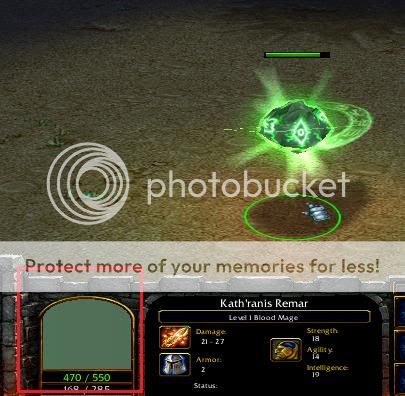
Oh good lord! The horror!
Do not despair.
Through some very simple steps, you can add functional portraits to any model you wish, solving this problem easily.
So, shall we begin?
Table of Contents
1 - Required programs
2 - MPQ-files
3 - Cameras and their functions
4 - Finishing touches
5 - La grande finale
6 - Troubleshooting
Step One - Required programs
To follow the steps shown in this tutorial, you will need Magos Model Editor, which is found here, and TFT World Editor, the patch level does not matter. Once you have downloaded Magos Model Editor (Refered to as MME from hereforth) open it, and proceed to the next step.
Step Two - Using The MPQ-browser
Note - If you already have past experience with the MME, but only wonder about how to add portraits, feel free to skip to the third step.
This step is simply about familiarizing yourself with the windows and features we will be using in this tutorial.
MPQ Browser - Found under Windows, this opens up a window which allows you to browse between four sets of MPQ-files. All MPQs can be found under File. It also allows you to open up self-made MPQ-files, but I won't cover that in this tutorial. The MPQ-browser also allows filtering of specific filetypes, such as *.mdx and *.mdl, *.slk and *.txt. All filter settings are found, believe it or not, under the field Filter in the MPQ browser window.
The first MPQ-file, War3.mpq, is the MPQ-file of Reign of Chaos. Here you can find all models, textures and other files from RoC's campaigns. Some files here aren't included in the other MPQs.
The second MPQ-file, War3x.mpq, is the MPQ-file of The Frozen Throne. Only models, textures and other files from TFT are located in this MPQ. All models from War3.mpq work in The Frozen Throne.
The third one, War3local.mpq, contains only sound, string and other filetypes. No models or textures.
The fourth and final file, War3patch.mpq, contains all the units and file changes made from the last patch.
The MPQ-browser and the Camera Manager are the only tools we will be using in this task. I will proceed on explaining the Camera Manager and how to add the portrait itself in the next step.
Step Three - The Camera Manager and Portraits
Now I suppose you know how to open the MPQ-browser, and find the MPQ in which the model you wish to portrait is contained. If not, I'll suggest that you read step two again.
With the MME open, go to the MPQ-browser. Click it, then select File, and then the MPQ-file which your model is located in. I'm going to choose War3x.mpq, and use the Eye of Sargeras model.
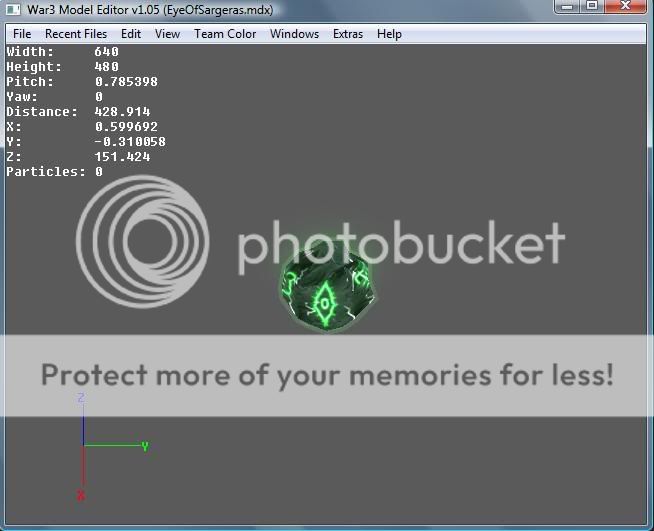
This is what the MME shows when I open my Eye of Sargeras model. It is unanimated, but the portrait will display the unit's stand animation ingame.
Now, and this step is cruical. Adjust the field of view in the MME by dragging with the left mouse button (rotating) and rolling the mouse wheel (zooming) into the viewing angle you want for your portrait picture. Do not change anything in the preview screen now.
Remember: The angle and zoom you have set in the preview screen now will be the unit's portrait picture ingame. If the picture seems too zoomed in, zoom it out. And practice makes perfect")
Let's continue. Open the Camera Manager, which is also found under Windows. When the Camera Manager is open, right click within the Camera Manager window, and press Create New from Current View.
This is what should pop up after you've pressed Create New from Current View:
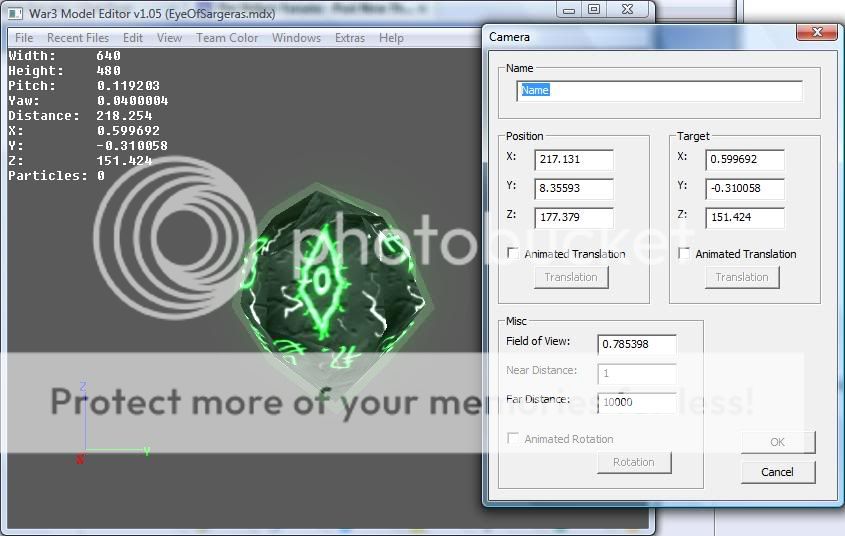
In the background you can see the zooming and panning I've chosen for my Eye of Sargeras portrait.
Name your camera whatever you might wish, it has no effect on the portrait itself. I chose to name my camera Carmel. As we move on, we will cover saving and importing the new model.
Note: If you are unsure about the camera after creating it, zoom far out, and then right click on the camera and press View Camera. The field of view will then be adjusted to what the camera's settings are. If you are unhappy, remove the camera (right click it, and press remove) and repeat the above instructions.
Step Four - Finishing Touches
Now that you have successfully attached the camera to your model, it's time to save it.
Go to File, and press Save As. Find a suitable directory (if the directory searcher is only a small strip, press Browse Folders, it's a button at the bottom-left side of the window) and give the model a name of your own wish.
Now, before pressing save, make sure you add .mdx to the end of the model's name. If not, the MME will give you an error which says "Unknown extension".
Now that you've saved the model, it's time to import it. If you haven't imported any models before, follow these steps:
First: Open your World Editor.
Second: Open the Import Manager (Or press F12).
Third: Press Import File, or Ctrl+I.
Fourth: Find the directory of the model you made and double-click it.
Fifth: Restart the World Editor, remember to save the map.
Sixth: Open the World Editor again, and then change a unit's model file to the file you just imported.
Seventh: If the model doesn't appear in the preview when you've selected it, restart the World Editor again.
Eight: Go to the next step!
Step Five - Le Grande Finale
We're almost done! If you've followed the instructions correctly, you should now have a perfectly functional model with an added portrait. We shall see.
Make sure you save the map before pressing the Test Map button. When that's done, Press the Test Map button (Ctrl + F9). Let your anticipation build up as the map loads, and when it's finished, select your unit and (hopefully) admire your results!
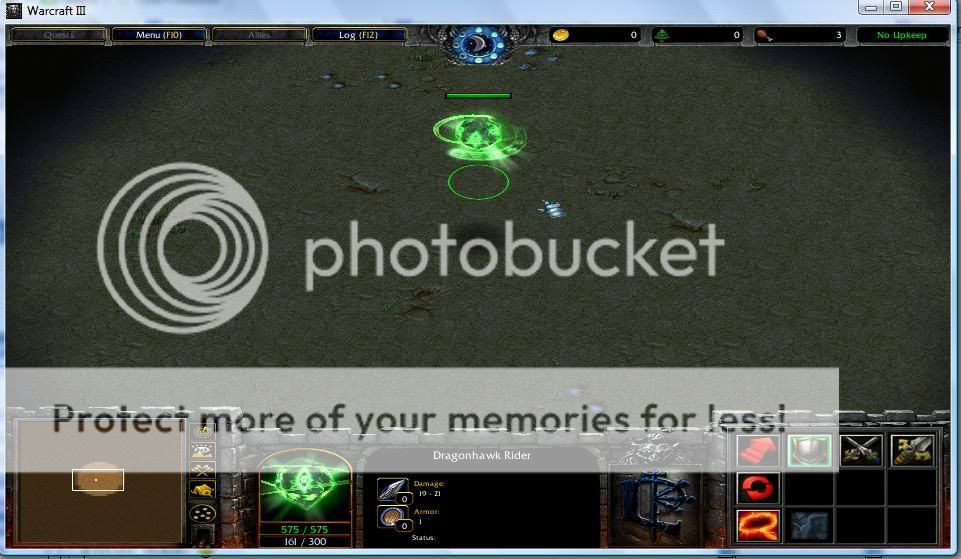
That's better. Don't you agree?
Step Six - Troubleshooting
Q: The map instantly gives me a victory when testing the map!
A: Remove the Melee Initialization triggers.
Q: The model doesn't show up in the game!
A: Make sure you've restarted and saved the map properly.
Q: The game instantly takes me to the start screen!
A: Save the map before testing it.
If anyone else has any questions, feel free to post them
Thank you.
We've all been there. You want to use a model for a unit, preferably some flashy special effect that can move about and be selected. This unit is vital to your map, and it having a portrait is crucial for the good-lookingness of the map as a whole. Then you discover that the model's portrait is all messed up. Sometimes it views the model from an extreme close-up, sometimes the view only flashes, and sometimes it doesn't even view the model. What can be done?!
Oh good lord! The horror!
Do not despair.
Through some very simple steps, you can add functional portraits to any model you wish, solving this problem easily.
So, shall we begin?
Table of Contents
1 - Required programs
2 - MPQ-files
3 - Cameras and their functions
4 - Finishing touches
5 - La grande finale
6 - Troubleshooting
Step One - Required programs
To follow the steps shown in this tutorial, you will need Magos Model Editor, which is found here, and TFT World Editor, the patch level does not matter. Once you have downloaded Magos Model Editor (Refered to as MME from hereforth) open it, and proceed to the next step.
Step Two - Using The MPQ-browser
Note - If you already have past experience with the MME, but only wonder about how to add portraits, feel free to skip to the third step.
This step is simply about familiarizing yourself with the windows and features we will be using in this tutorial.
MPQ Browser - Found under Windows, this opens up a window which allows you to browse between four sets of MPQ-files. All MPQs can be found under File. It also allows you to open up self-made MPQ-files, but I won't cover that in this tutorial. The MPQ-browser also allows filtering of specific filetypes, such as *.mdx and *.mdl, *.slk and *.txt. All filter settings are found, believe it or not, under the field Filter in the MPQ browser window.
The first MPQ-file, War3.mpq, is the MPQ-file of Reign of Chaos. Here you can find all models, textures and other files from RoC's campaigns. Some files here aren't included in the other MPQs.
The second MPQ-file, War3x.mpq, is the MPQ-file of The Frozen Throne. Only models, textures and other files from TFT are located in this MPQ. All models from War3.mpq work in The Frozen Throne.
The third one, War3local.mpq, contains only sound, string and other filetypes. No models or textures.
The fourth and final file, War3patch.mpq, contains all the units and file changes made from the last patch.
The MPQ-browser and the Camera Manager are the only tools we will be using in this task. I will proceed on explaining the Camera Manager and how to add the portrait itself in the next step.
Step Three - The Camera Manager and Portraits
Now I suppose you know how to open the MPQ-browser, and find the MPQ in which the model you wish to portrait is contained. If not, I'll suggest that you read step two again.
With the MME open, go to the MPQ-browser. Click it, then select File, and then the MPQ-file which your model is located in. I'm going to choose War3x.mpq, and use the Eye of Sargeras model.
This is what the MME shows when I open my Eye of Sargeras model. It is unanimated, but the portrait will display the unit's stand animation ingame.
Now, and this step is cruical. Adjust the field of view in the MME by dragging with the left mouse button (rotating) and rolling the mouse wheel (zooming) into the viewing angle you want for your portrait picture. Do not change anything in the preview screen now.
Remember: The angle and zoom you have set in the preview screen now will be the unit's portrait picture ingame. If the picture seems too zoomed in, zoom it out. And practice makes perfect
Let's continue. Open the Camera Manager, which is also found under Windows. When the Camera Manager is open, right click within the Camera Manager window, and press Create New from Current View.
This is what should pop up after you've pressed Create New from Current View:
In the background you can see the zooming and panning I've chosen for my Eye of Sargeras portrait.
Name your camera whatever you might wish, it has no effect on the portrait itself. I chose to name my camera Carmel. As we move on, we will cover saving and importing the new model.
Note: If you are unsure about the camera after creating it, zoom far out, and then right click on the camera and press View Camera. The field of view will then be adjusted to what the camera's settings are. If you are unhappy, remove the camera (right click it, and press remove) and repeat the above instructions.
Step Four - Finishing Touches
Now that you have successfully attached the camera to your model, it's time to save it.
Go to File, and press Save As. Find a suitable directory (if the directory searcher is only a small strip, press Browse Folders, it's a button at the bottom-left side of the window) and give the model a name of your own wish.
Now, before pressing save, make sure you add .mdx to the end of the model's name. If not, the MME will give you an error which says "Unknown extension".
Now that you've saved the model, it's time to import it. If you haven't imported any models before, follow these steps:
First: Open your World Editor.
Second: Open the Import Manager (Or press F12).
Third: Press Import File, or Ctrl+I.
Fourth: Find the directory of the model you made and double-click it.
Fifth: Restart the World Editor, remember to save the map.
Sixth: Open the World Editor again, and then change a unit's model file to the file you just imported.
Seventh: If the model doesn't appear in the preview when you've selected it, restart the World Editor again.
Eight: Go to the next step!
Step Five - Le Grande Finale
We're almost done! If you've followed the instructions correctly, you should now have a perfectly functional model with an added portrait. We shall see.
Make sure you save the map before pressing the Test Map button. When that's done, Press the Test Map button (Ctrl + F9). Let your anticipation build up as the map loads, and when it's finished, select your unit and (hopefully) admire your results!
That's better. Don't you agree?
Step Six - Troubleshooting
Q: The map instantly gives me a victory when testing the map!
A: Remove the Melee Initialization triggers.
Q: The model doesn't show up in the game!
A: Make sure you've restarted and saved the map properly.
Q: The game instantly takes me to the start screen!
A: Save the map before testing it.
If anyone else has any questions, feel free to post them
Thank you.

