
Ryuu
I am back with Chocolate (:
- Reaction score
- 64
Finding Correct Import Paths
by Ryuu
by Ryuu
What is this?
This a tutorial about import paths. In this tutorial, you'll basically learn how to find the correct import paths when importing using the Import Manager.
Why do we need to find correct import paths?
Normally, files imported into the map using the Import Manager will come up with the import path as war3mapImported/<FileName>.<FileExtension>. However, most of the time, this import path is wrong.
So how do we find the correct one?
Let's move on.
Firstly, you need to find a file. For this tutorial, we'll use a model known as Rukia.mdx. Yes, it is based on a character from Bleach. Now, open up Import Manager (F12) and select File > Import File....
You should see this:
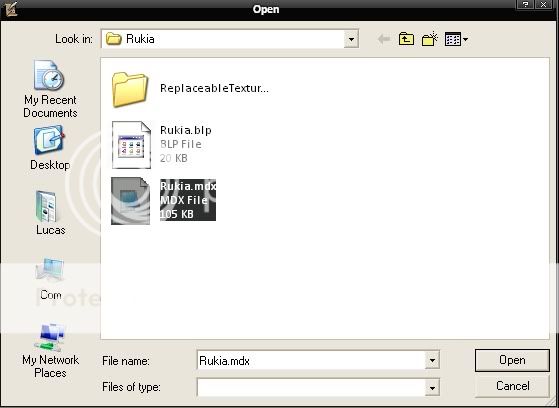
Now, select your model (models comes in .mdx extensions) and click Open.
This should now appear in the Import Manager:

Note that this model is the shape only. It is a plain, colorless form. Hence, in order for Warcraft to identify it as a proper model, we need a texture. The texture is like the coloring and the outside of the model. With the texture, the model is complete.
Usually, when you download a model from TH.net or other websites, the package should include a texture file.
Now, select File > Import File... again and this time select your texture (textures comes in .blp extensions) and click Open.
You should see this in the Import Manager:

However, World Editor still cannot identify these files as a 'model', because the path is wrong. The paths doesn't lead to the file at all. You need to specify the correct path before World Editor can finally show the model.
This can be done so by first locating the model in your local hard drive. Depending on where you installed it, right-click your model.
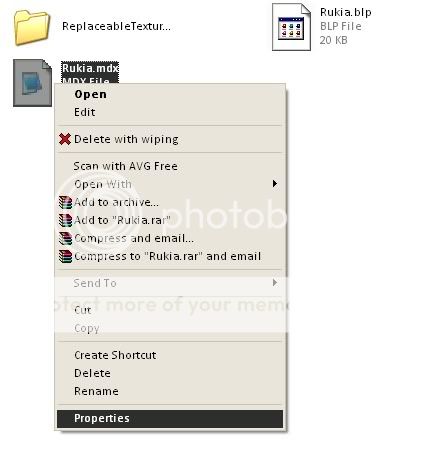
Select Properties. The following should appear:
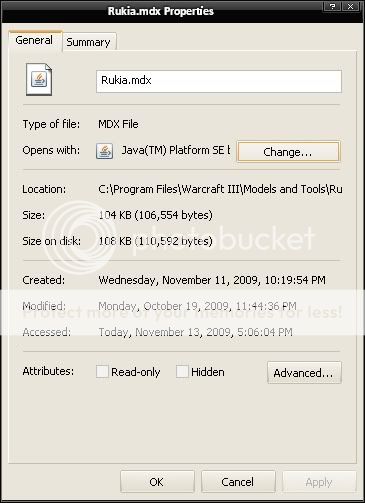
Select Change.... The following should appear:
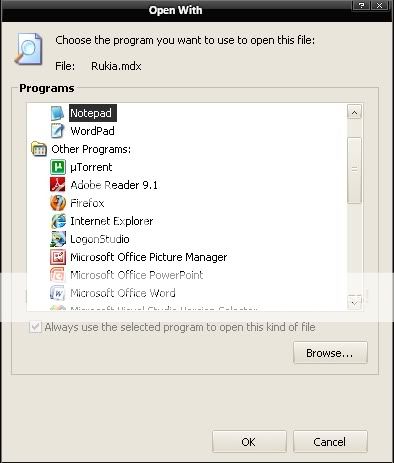
Scroll down the list till you find Notepad. Click on it, then select OK.
Now select OK again, and then double-click on the model.
You should see SOMETHING like this:
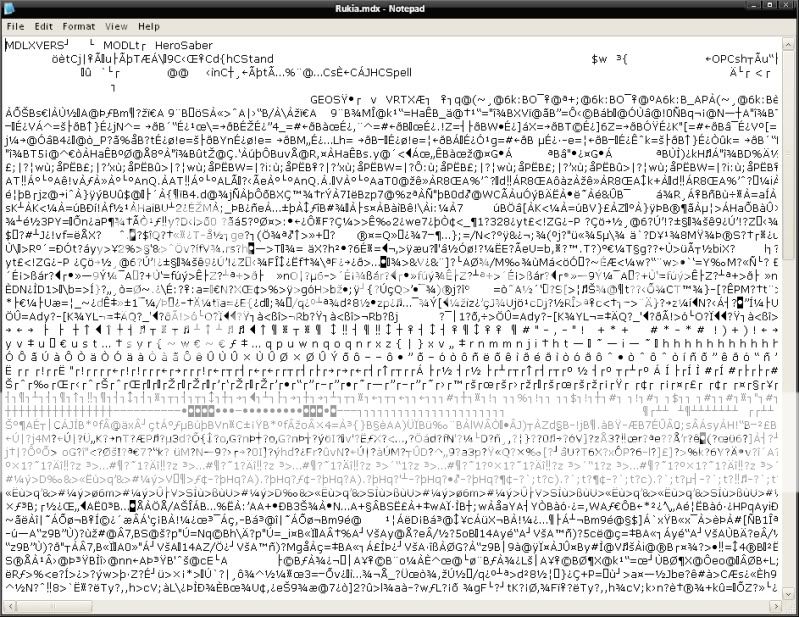
Yeah, that's a whole chunk of gibberish. But 99% of that junk there is no concern to us. We only need the first four lines of that.
Keep scrolling right, keeping your eyes on the first four lines, till you find something that has your texture's name on it:
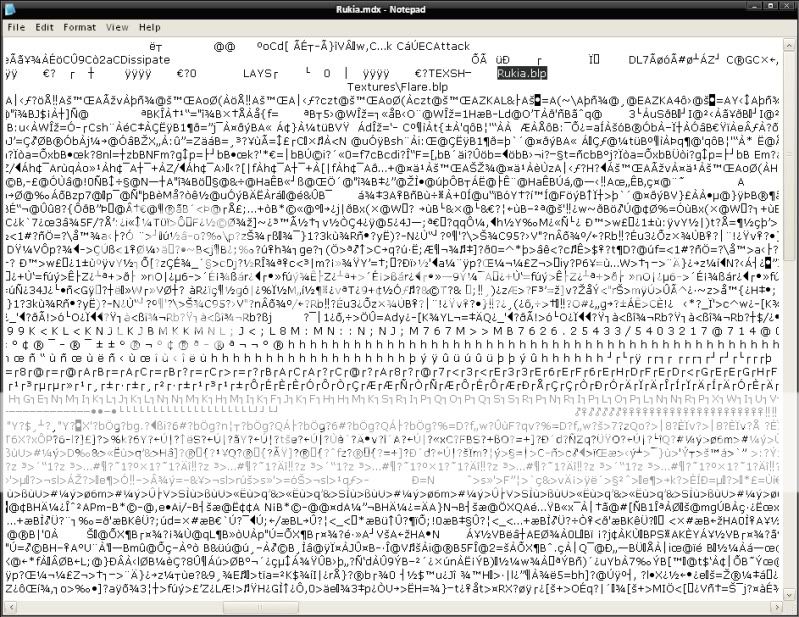
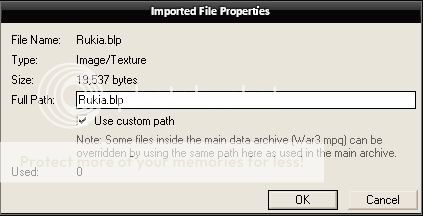
That is the correct import path to the texture, Rukia.blp. Now head back to the Import Manager, and double-click on Rukia.blp. You should see this:

Tick Use custom path. That should make the field editable.
So replace the things in the field with Rukia.blp, the import path that we had found in the chunk of gibberish. It should look something like this:
Click on OK.
Done!
What about the model's import path?
Set it to simply anything. (e.g. Ryuu.mdx)
Thank you for reading!! I hope this short tutorial helps you ")

