
Quick Forest Terraining by mr-death
Warcraft III The Frozen Throne World Editor needed.
Classification: Forest Terraining. Tutorial for: Pros and Newbies. Difficulty: Medium
_________________________ _____________________________________________ ________________________
Took only 10-20 (If you practice, it will be 5-10) minutes to create a nice forest.
On creating a Realistic Atmosphere of Terrains, you must remember one thing:
- Casualness! No Natural Forest in this world is Monotone!
_________________________ _____________________________________________ ________________________
Contents (Use Ctrl+F (Find) to jump to the part)
I. Instruction for Newbie
II. Instruction for Pro
III. Instruction for Noise-Smooth step
IV. Forest
_________________________ _____________________________________________ ________________________
I. Instruction for Newbie
Open your WE Terrain Editor, you will see the Palette on the right side of the Ground Texture!
(If you don't see anything, pick menu Windows, submenu New Palette, subsubmenu Terrain Palette)
Here you can set the palette to Unit Palette, Doodad Palette, Terrain Palette, Region Palette, and Camera Palette.
The used ones are just Doodad Palette and Terrain Palette, the orders will be seen below.
Then you should be Introduced to the Palettes first.
Introduction to used Palettes for Newbie
[Doodad Palette]
Here, in Doodad Palette, you can see an option for the Tileset, an option for the Type, and a list of Doodads, then under the list you will see Brush Size and Brush Shape.
Simple way of making doodads:
1. Pick a doodad type,
2. Pick a Brush Size,
3. Pick a Brush Type,
4. click on the Ground!
[Terrain Palette]
Then, move onto Terrain Palette, here you can see an option for Apply Texture, an option for Apply Cliff, an option for Cliff Type, an option for Apply Height, and Lastly Brush Size and Shape again.
Simple way of making ground texture:
1. Pick a terrain texture, by clicking on the textures
2. Choose the Brush Size and Shape
3. Click on the ground!
Simple way of making ground cliffs:
1. Pick a terrain cliff, by clicking one of them (increase one, increase two, decrease one, decrease two, same level, ramp, shallow water, deep water)
2. Pick a cliif type, by clicking one of the cliff types.
3. Choose the Brush Size and Shape
4. Click on the ground!
Simple way of making ground heights:
1. Pick an option in apply height,
2. Choose the Brush Size and Shape
3. Click on the ground!
_________________________ _____________________________________________ ________________________
II. Instruction for Pro
Learn the Noise-Smooth step below
Open your Terrain Editor, then see the step pictures below (just scroll down, see, scroll down, see, scroll down, see) and follow them.
...that's enough isn't it?
_________________________ _____________________________________________ ________________________
III. Instruction for Noise-Smooth step
oh yeah, one more thing: learn the Noise-Smooth step:
1. noise all the Forest into ashes. (into ashes means don't left anything un-noised)
2. then notice the black holes on the green brush (looks like black holes, aren't they)
that looks like
this
3. then purifies all the Forest with smooth, make sure you still have wavy ground without black holes.
_________________________ _____________________________________________ ________________________
IV. Forest
Then, let's get to the point, open the Terrain Editor.
_________________________ _____________________________________________ ________________________
[Doodad Palette]
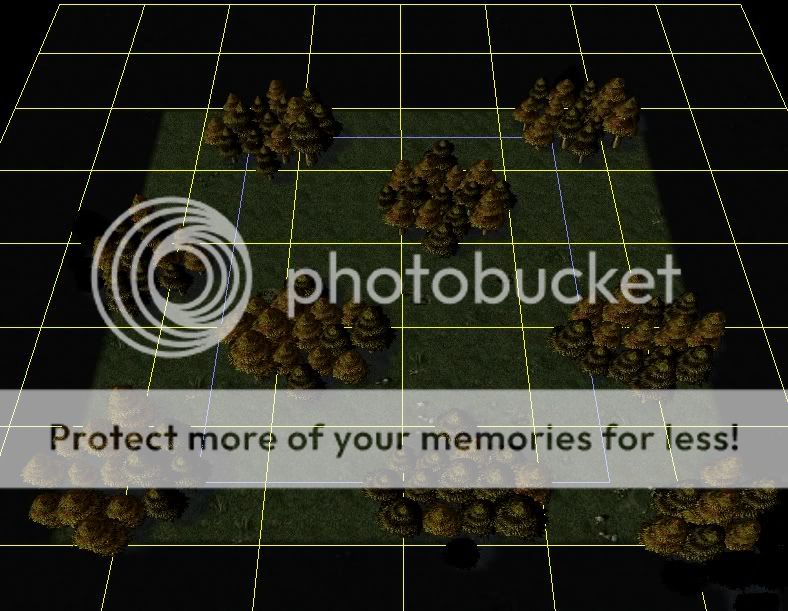
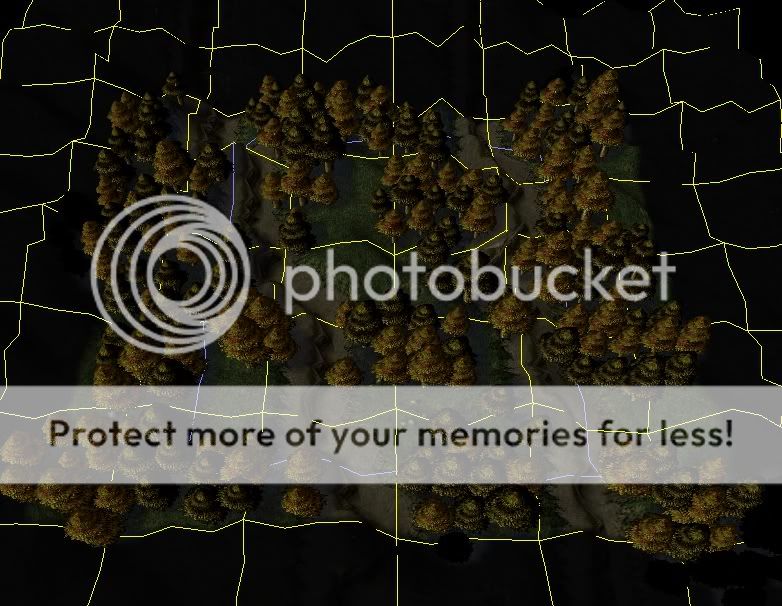
Now you're in Terrain Editor, so pick the Tree Wall and create Trees randomly as shown below!
Brush Size: 3
Brush Shape: Circle (It's a lot casual than the monotone Square brush)
Remember for some Spaces, so it will be like this:
_________________________ _____________________________________________ ________________________
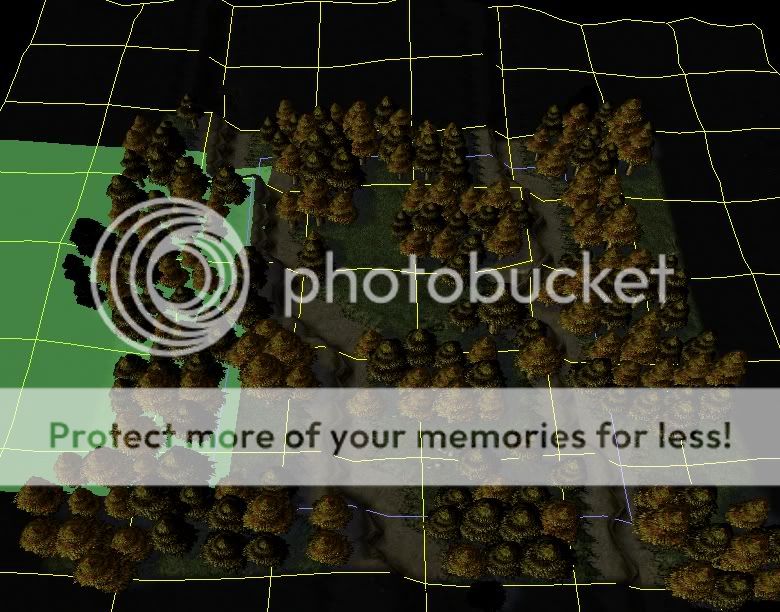
[Doodad Palette]
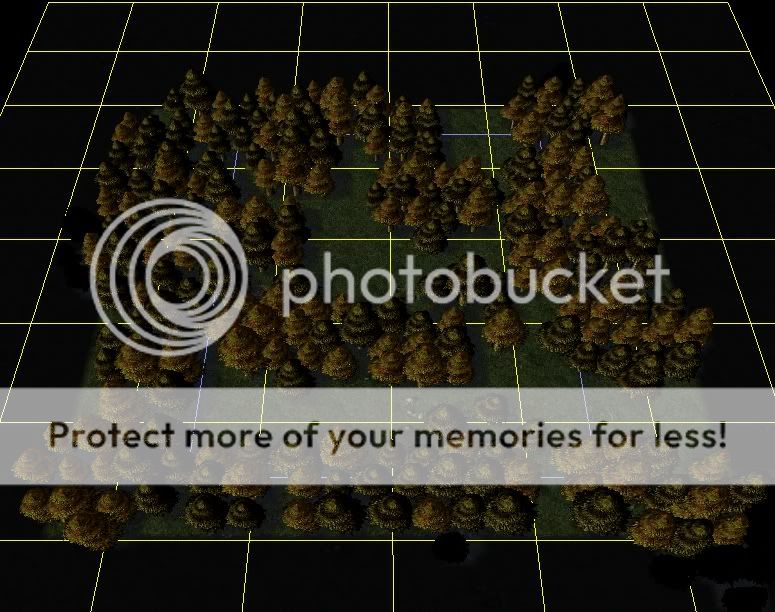
Second, create Trees randomly with
Brush Size: 2
Brush Shape: Square (To add complexity)
Click and hold on one point and sweep it randomly so it will be like this:
Always remember to have some spaces!
_________________________ _____________________________________________ ________________________
[Terrain Palette]
A Forest with the same level will be Monotone so Third, create Different Level with
Apply Cliff: Increase Two & Increase One
Brush Size: 2
Brush Shape: Square (In this case, Circle will be far too Casual! <don't try>)
Create a Huge area for each level, so it will be a ramps forest, looks real enough to enjoy!
_________________________ _____________________________________________ ________________________
[Terrain Palette]
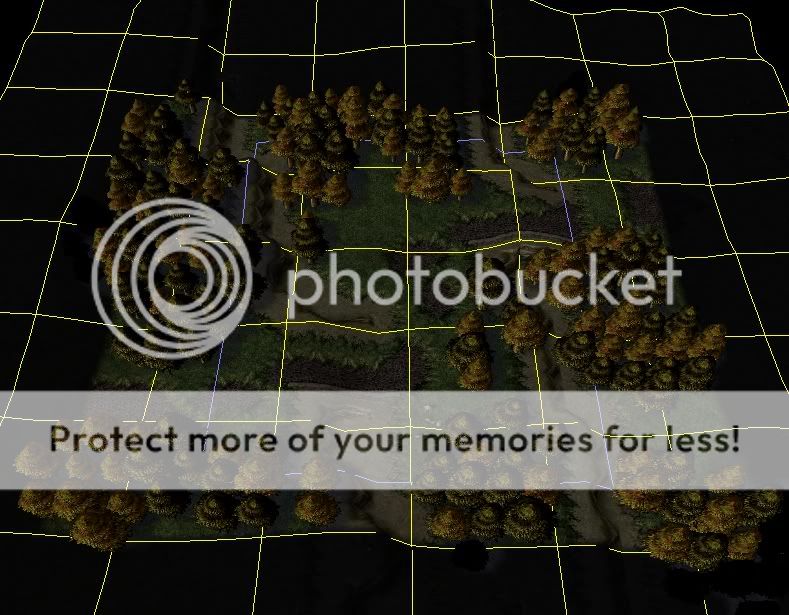
A Forest without any ground broke, is not realistic! so Fourth, create Different Ground Texture with:
Apply Height: Noise and Smooth (Hell Yeah!)
Brush Size: 4-8
Brush Shape: Square (No big difference in the Shape, anyway I use Square)
noise all the Forest into ashes!
then notice the black holes on the green brush!
then purifies all the Forest with smooth! (note here, you should smooth it by click slowly one by one, and only until the black holes above are removed) so the ground will be wavy without black holes:
_________________________ _____________________________________________ ________________________
[Terrain Palette] and [Doodad Palette]
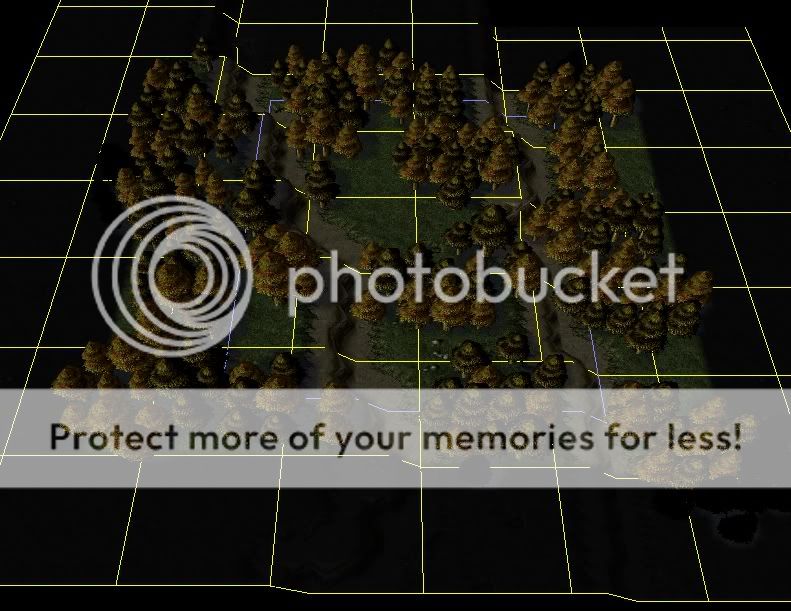
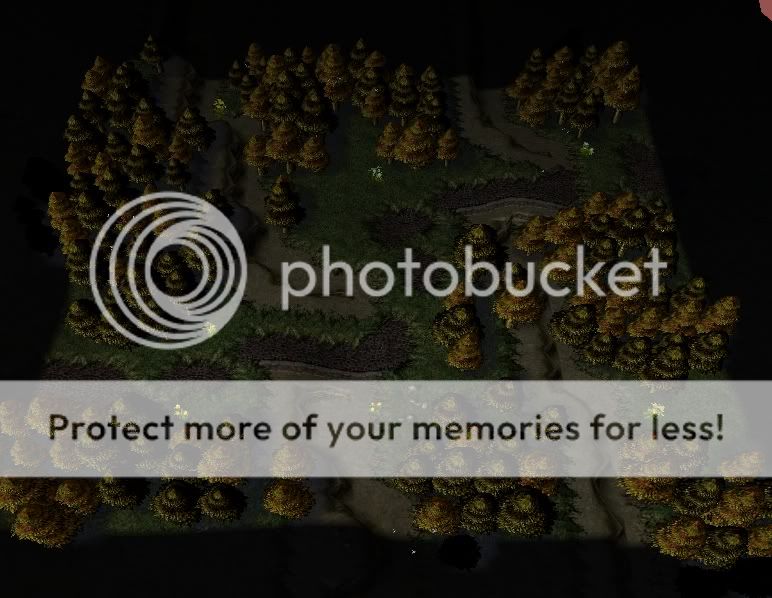
Next is decide the path you want to make, by creating ramps and removing some trees!
Use Selection Brush for Doodad Palette, and remove the annoying trees, then create ramps for the path, finally create the path:
Tips: to create realistic path, add some grass randomly on it!
_________________________ _____________________________________________ ________________________
[Doodad Palette]
Next, add accessories! The forest won't be enough with just trees and earth broking, add some flowers, birds, etc. Make sure you blend them all, so there will be no "emptiness" on the forest.
_________________________ _____________________________________________ ________________________
[Menu: Scenario]
If you want perfect warmth of the sun, add Sky, Fog, and anything you want on the Scenario - Options and Prefs,
_________________________ _____________________________________________ ________________________
The Forest now, is enjoyable! Take deep breath and see the lights... Refreshing!
_________________________ _____________________________________________ ________________________
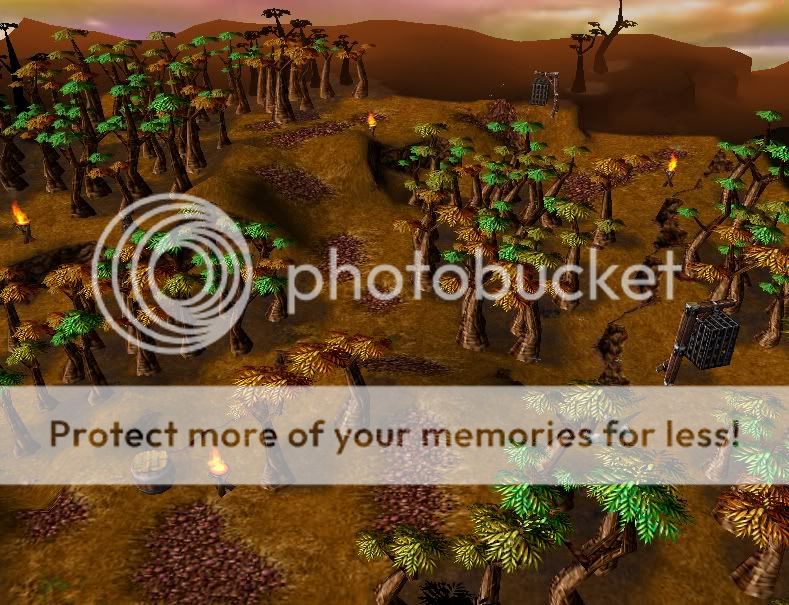
Adding some Bandits, Trolls, or else? As you wish!

_________________________ _____________________________________________ ________________________
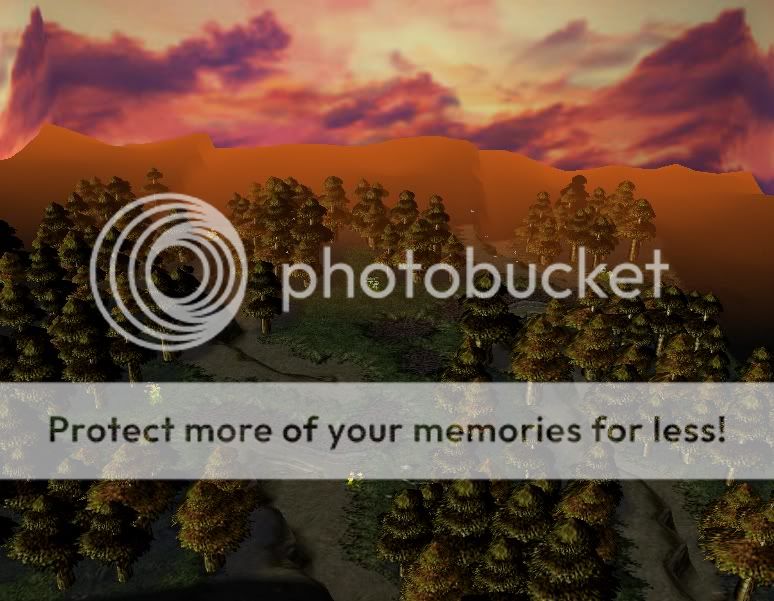
Forest Gallery...
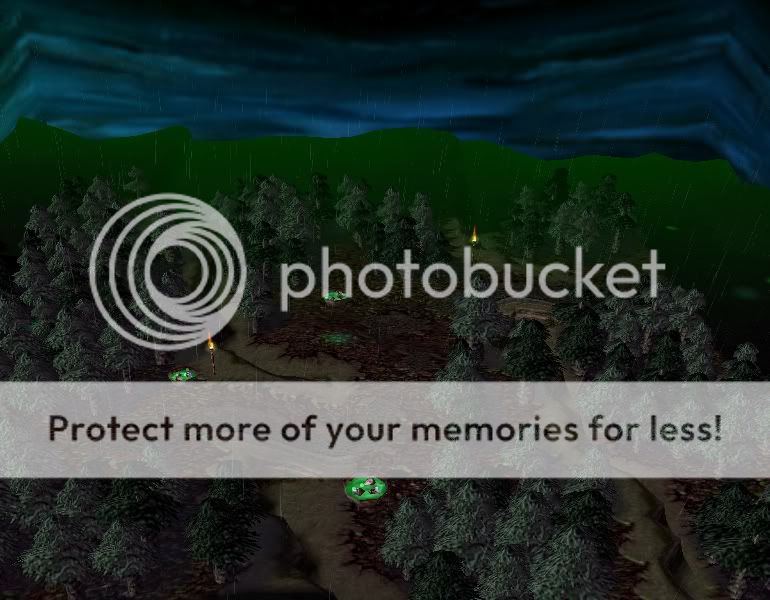
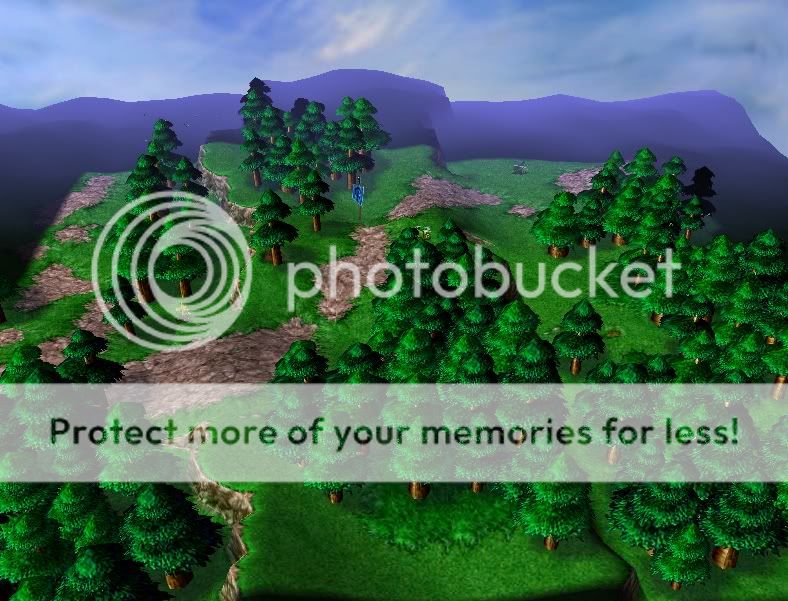
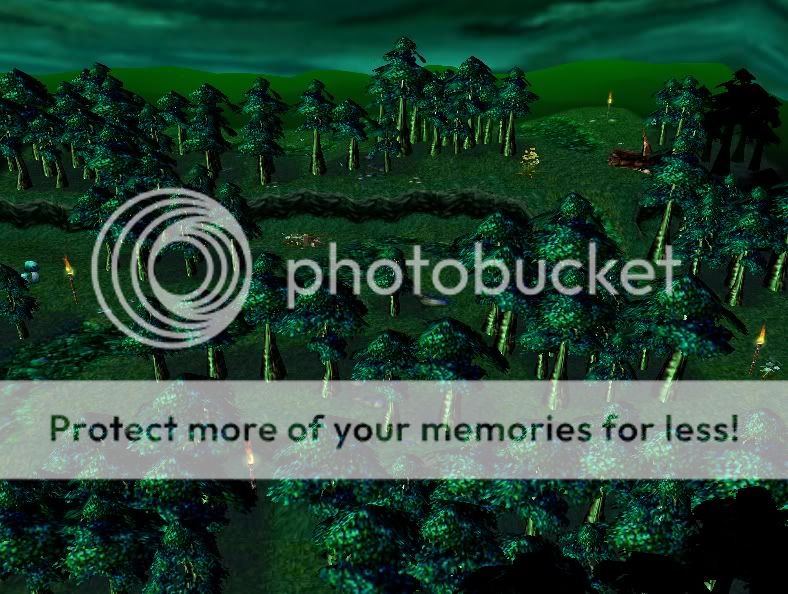
Took 5-10 minutes for each forest above. Try yourself!
_________________________ _____________________________________________ ________________________
These are my tips:
The more time you spend on terraining, the more you can feel "WOW"
The more you practise, the faster you can get a nice forest
The more your skills and creativity, the better forest you get
The more doodads you use, the less emptiness you feel
_________________________________________________________________
I believe there are soooo many better forests than my forests so don't worry")
_________________________ _____________________________________________ ________________________
Tricks? I used only one trick:
Noise-Smooth step (III. Instruction for Noise-Smooth step)
This trick will make your map look a lot casual and natural!
Believe it or no, my forest with and without this step is very very different!
_________________________ _____________________________________________ ________________________
Hope they Help you a bit!
Good Luck!
Edit I June 12th, 2007: More Gallery Pictures
Edit II July 2nd, 2007 : More specifications for Newbie and pros, added tips on post #13
Warcraft III The Frozen Throne World Editor needed.
Classification: Forest Terraining. Tutorial for: Pros and Newbies. Difficulty: Medium
_________________________ _____________________________________________ ________________________
Took only 10-20 (If you practice, it will be 5-10) minutes to create a nice forest.
On creating a Realistic Atmosphere of Terrains, you must remember one thing:
- Casualness! No Natural Forest in this world is Monotone!
_________________________ _____________________________________________ ________________________
Contents (Use Ctrl+F (Find) to jump to the part)
I. Instruction for Newbie
II. Instruction for Pro
III. Instruction for Noise-Smooth step
IV. Forest
_________________________ _____________________________________________ ________________________
I. Instruction for Newbie
Open your WE Terrain Editor, you will see the Palette on the right side of the Ground Texture!
(If you don't see anything, pick menu Windows, submenu New Palette, subsubmenu Terrain Palette)
Here you can set the palette to Unit Palette, Doodad Palette, Terrain Palette, Region Palette, and Camera Palette.
The used ones are just Doodad Palette and Terrain Palette, the orders will be seen below.
Then you should be Introduced to the Palettes first.
Introduction to used Palettes for Newbie
[Doodad Palette]
Here, in Doodad Palette, you can see an option for the Tileset, an option for the Type, and a list of Doodads, then under the list you will see Brush Size and Brush Shape.
Simple way of making doodads:
1. Pick a doodad type,
2. Pick a Brush Size,
3. Pick a Brush Type,
4. click on the Ground!
[Terrain Palette]
Then, move onto Terrain Palette, here you can see an option for Apply Texture, an option for Apply Cliff, an option for Cliff Type, an option for Apply Height, and Lastly Brush Size and Shape again.
Simple way of making ground texture:
1. Pick a terrain texture, by clicking on the textures
2. Choose the Brush Size and Shape
3. Click on the ground!
Simple way of making ground cliffs:
1. Pick a terrain cliff, by clicking one of them (increase one, increase two, decrease one, decrease two, same level, ramp, shallow water, deep water)
2. Pick a cliif type, by clicking one of the cliff types.
3. Choose the Brush Size and Shape
4. Click on the ground!
Simple way of making ground heights:
1. Pick an option in apply height,
2. Choose the Brush Size and Shape
3. Click on the ground!
_________________________ _____________________________________________ ________________________
II. Instruction for Pro
Learn the Noise-Smooth step below
Open your Terrain Editor, then see the step pictures below (just scroll down, see, scroll down, see, scroll down, see) and follow them.
...that's enough isn't it?
_________________________ _____________________________________________ ________________________
III. Instruction for Noise-Smooth step
oh yeah, one more thing: learn the Noise-Smooth step:
1. noise all the Forest into ashes. (into ashes means don't left anything un-noised)
2. then notice the black holes on the green brush (looks like black holes, aren't they)
that looks like
this
3. then purifies all the Forest with smooth, make sure you still have wavy ground without black holes.
_________________________ _____________________________________________ ________________________
IV. Forest
Then, let's get to the point, open the Terrain Editor.
_________________________ _____________________________________________ ________________________
[Doodad Palette]
Now you're in Terrain Editor, so pick the Tree Wall and create Trees randomly as shown below!
Brush Size: 3
Brush Shape: Circle (It's a lot casual than the monotone Square brush)
Remember for some Spaces, so it will be like this:
_________________________ _____________________________________________ ________________________
[Doodad Palette]
Second, create Trees randomly with
Brush Size: 2
Brush Shape: Square (To add complexity)
Click and hold on one point and sweep it randomly so it will be like this:
Always remember to have some spaces!
_________________________ _____________________________________________ ________________________
[Terrain Palette]
A Forest with the same level will be Monotone so Third, create Different Level with
Apply Cliff: Increase Two & Increase One
Brush Size: 2
Brush Shape: Square (In this case, Circle will be far too Casual! <don't try>)
Create a Huge area for each level, so it will be a ramps forest, looks real enough to enjoy!
_________________________ _____________________________________________ ________________________
[Terrain Palette]
A Forest without any ground broke, is not realistic! so Fourth, create Different Ground Texture with:
Apply Height: Noise and Smooth (Hell Yeah!)
Brush Size: 4-8
Brush Shape: Square (No big difference in the Shape, anyway I use Square)
noise all the Forest into ashes!
then notice the black holes on the green brush!
then purifies all the Forest with smooth! (note here, you should smooth it by click slowly one by one, and only until the black holes above are removed) so the ground will be wavy without black holes:
_________________________ _____________________________________________ ________________________
[Terrain Palette] and [Doodad Palette]
Next is decide the path you want to make, by creating ramps and removing some trees!
Use Selection Brush for Doodad Palette, and remove the annoying trees, then create ramps for the path, finally create the path:
Tips: to create realistic path, add some grass randomly on it!
_________________________ _____________________________________________ ________________________
[Doodad Palette]
Next, add accessories! The forest won't be enough with just trees and earth broking, add some flowers, birds, etc. Make sure you blend them all, so there will be no "emptiness" on the forest.
_________________________ _____________________________________________ ________________________
[Menu: Scenario]
If you want perfect warmth of the sun, add Sky, Fog, and anything you want on the Scenario - Options and Prefs,
_________________________ _____________________________________________ ________________________
The Forest now, is enjoyable! Take deep breath and see the lights... Refreshing!
_________________________ _____________________________________________ ________________________
Adding some Bandits, Trolls, or else? As you wish!
_________________________ _____________________________________________ ________________________
Forest Gallery...
Took 5-10 minutes for each forest above. Try yourself!
_________________________ _____________________________________________ ________________________
These are my tips:
The more time you spend on terraining, the more you can feel "WOW"
The more you practise, the faster you can get a nice forest
The more your skills and creativity, the better forest you get
The more doodads you use, the less emptiness you feel
_________________________________________________________________
I believe there are soooo many better forests than my forests so don't worry
_________________________ _____________________________________________ ________________________
Tricks? I used only one trick:
Noise-Smooth step (III. Instruction for Noise-Smooth step)
This trick will make your map look a lot casual and natural!
Believe it or no, my forest with and without this step is very very different!
_________________________ _____________________________________________ ________________________
Hope they Help you a bit!
Good Luck!
Edit I June 12th, 2007: More Gallery Pictures
Edit II July 2nd, 2007 : More specifications for Newbie and pros, added tips on post #13


