
Aqua Dragon
I'm made of water. Remember that now.
- Reaction score
- 72
Hi there. I've been hearing about alot of people who wanted to learn how to skin models, and now i'm going to make that tutorial. But don't read this until you read my other tutorial, otherwise you won't have General Smartypants ready for skinning. Heres the link. (I just want you to know, i couldn't make any of the images smaller otherwise the thing I'm talking about couldn't be seen.)
http://www.thehelper.net/forums/showthread.php?p=345492#post345492
Now lets get started!!!
STEP 1: Getting Ready To Skin
Notes to remember: This is MY way of skinning the models, there are lots of ways to skin the models. So be creative and try finding better ways to skin the models then me. And tell me if you fix that black problem (You will find that later in the tutorial. Also, if you don't skin the models by adding new skins and all you do is change the scaling and things, then Import it, it will appear normally.) A final note to remember is that some of the things in this tutorial about this editor might be off due to the date I used the program and created this tutorial.
General smartypants was now happy, who wouldn't be without all that extra weight and a big head? But heres the thing, he wants gold armor. Thats right. Gold armor. So lets help the general out huh? Remember to get General Smartypants out again. First, lets get out Paint(Remember, use anything else you want, some things like "photoshop" may be better and may not create black spots. mainyl because of alpha waves or something like that... not sure. just basically do the same thing with whatever thing like photoshop you may use, this goes for every time I say "Paint"). Hit "Start", then "All Programs". Then find "Accesories". After that, hit "Paint". Now get a second paint out, it will come in handy. Ok, first of all, we need to know where the various parts of General Smartypants are, so we know where to attach to the skin to the selected parts. First of all, we will create something called, "MAin Parts Of The Unit". Make the rectangle that you can work in 480x320. Like this
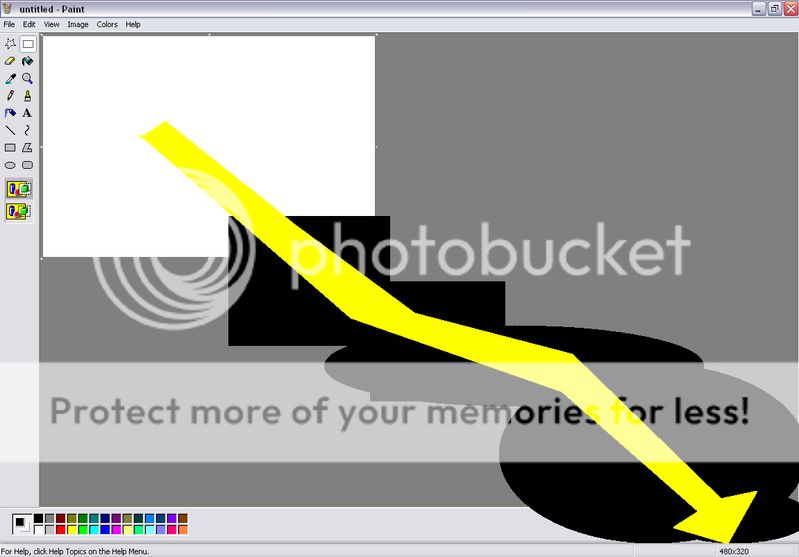
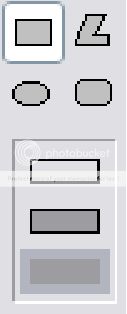
As you drag the borders in what you can draw in, that should change. Make sure it says 480x320 when you're done dragging. Now to make this work. Grab the first color, which should be "Gray" if you didn't edit the colors, but even if you did, as long as 2 colors don't look the same. But DO NOT use black, otherwise if some parts cannot be edited, you won't know. so use the color next to "Black". which should be "Gray". then while your mouse is moving around the area, next to the place where it showed how much the border is, it should show a constantly changing thing that changes everytime you move. And while using the "Square" function, with the fill function. The square and fill function are here.
Now move your mouse to the 0x0 Position. From there while you drag, next to that it should change as you drag. Make that say 120x80. Good. now do this again except start at 0x80 and use a different color. And still only make it say 120x80. Now again, except start at 0x160. Then 0x240. Now you know thats as far down as you can do, so now start at 0x120. Then 80x120. Then 160x120. Etc., Etc., Etc.. It should look like this if you're done. (Except the color part, that determines what colors you chose.)

STEP 2: The Attachment.
General Smartypants has been getting a little impatient so lets rock. First off, in the "War3 Model Editor", Hit "Windows". Next Hit "Material Editor". Then "Texture Editor". Now in the "Texture Editor", right click it and then hit "Import". Then find where you saved "Main Parts Of A Unit". Import it. Now get the "Material Manager" out. Double click "01D60690". It should show 1 thing in a list. Double click that one thing and then look around. You should see something that says "Gutz". File through that list to replace it with "Main Parts Of A Unit". Then hit "OK". Then hit "OK" again. Er... well looks like we made a mistake, we only changed his skeleton. Lets fix that up. Do everything again and place "Gutz" back in. Thats better. This time hit "01DD50E8". Change that to "Main Parts Of A UNit". Oh crud... It looks like his body can't be edited. It just changes invisible whenever we try skinning him, one of the many problems that occur. Other problems may include but are not limited to 1) Unchangeble black. 2) Invisible body parts. 3) parts in wrong places (Fixible). But I have a solution. Go to the "MPQ Browser" and find "Marine" in the "Critters" section. Now lets change him into General Smartypants. Make his head 3 times bigger, make his gun 1.5 times bigger, Translate hit head up 20 to make it look attached. There. General Smartypants again. Should look like this.

Translate parts sticking out that you may have taken out if necassary. Now he looks good. But he still wants gold armor. So lets rock. First of all, go to www.Google.com and find a good picture of "Gold". A good example of gold is this.

Place this (or a better picture of gold you found) onto "Paint". Make it big so that way it seems good to use. Now lets wrap General Smartypants with the "Main Parts Of A Unit" skin. Use it on the material (Things in material manager) That has 2 on its list. Now on the one that doesn't say "Replaceable ID 1" (Which btw, is the color of the player controlling it) and replace it with "Main Parts Of A Unit". Colorful armor but not what we're aiming for. But it's the start of how I skin. Now have both of those paints ready. One that has the gold picture on it, the other with "Main Parts Of A Unit" on it. Now as you can see, the armor are all the colors on "Main Parts Of A Unit". So take out a chunk of gold like this. Use this tool

to make a square around the part that looks like gold and ONLY around the part that looks like gold. Try getting a mix of light gold and dark gold to give it that gold effect. If you know how to enlarge it, that would be great. Now right click and copy it. Then paste it on the "Main Parts Of A Unit" page on wherever the colors appear on the armor. If you understood it should look like this. (Also keep in mind, the armor around the legs cannot be changed due to one of those complications i mentioned earlier. Also remember to "Save AS", otherwise it will save it over "Main Parts Of A Unit").

We should have some pretty decent skin now. Now replace the material that has "MAin Parts Of A Unit" with "General Smartypants Skin" (Or whatever you called it). Lookin good general =). Heres a picture of the completed general.

FINAL STEP: CONGRATULATIONS!
Congratulations. you have finished reading this tutorial and now know how to skin my way. Remeber to skin the way YOU feel is right. this is only one way, grabbing stuff from a photo and implementing it into your model. So good luck. (Any comments on this tutorial on what i may have missed or need to add would be appreciated. Also, i will answer all questions to the best of my ability. But i don't know how to import so don't ask questions about importing. And it will only not import if you added an extra skin, editing the body without adding skins will still let you give a 100% import of the model. Also remember "Paint" may not be the best program to skin with so try using the art program you're comfortable with.)
http://www.thehelper.net/forums/showthread.php?p=345492#post345492
Now lets get started!!!
STEP 1: Getting Ready To Skin
Notes to remember: This is MY way of skinning the models, there are lots of ways to skin the models. So be creative and try finding better ways to skin the models then me. And tell me if you fix that black problem (You will find that later in the tutorial. Also, if you don't skin the models by adding new skins and all you do is change the scaling and things, then Import it, it will appear normally.) A final note to remember is that some of the things in this tutorial about this editor might be off due to the date I used the program and created this tutorial.
General smartypants was now happy, who wouldn't be without all that extra weight and a big head? But heres the thing, he wants gold armor. Thats right. Gold armor. So lets help the general out huh? Remember to get General Smartypants out again. First, lets get out Paint(Remember, use anything else you want, some things like "photoshop" may be better and may not create black spots. mainyl because of alpha waves or something like that... not sure. just basically do the same thing with whatever thing like photoshop you may use, this goes for every time I say "Paint"). Hit "Start", then "All Programs". Then find "Accesories". After that, hit "Paint". Now get a second paint out, it will come in handy. Ok, first of all, we need to know where the various parts of General Smartypants are, so we know where to attach to the skin to the selected parts. First of all, we will create something called, "MAin Parts Of The Unit". Make the rectangle that you can work in 480x320. Like this
As you drag the borders in what you can draw in, that should change. Make sure it says 480x320 when you're done dragging. Now to make this work. Grab the first color, which should be "Gray" if you didn't edit the colors, but even if you did, as long as 2 colors don't look the same. But DO NOT use black, otherwise if some parts cannot be edited, you won't know. so use the color next to "Black". which should be "Gray". then while your mouse is moving around the area, next to the place where it showed how much the border is, it should show a constantly changing thing that changes everytime you move. And while using the "Square" function, with the fill function. The square and fill function are here.
Now move your mouse to the 0x0 Position. From there while you drag, next to that it should change as you drag. Make that say 120x80. Good. now do this again except start at 0x80 and use a different color. And still only make it say 120x80. Now again, except start at 0x160. Then 0x240. Now you know thats as far down as you can do, so now start at 0x120. Then 80x120. Then 160x120. Etc., Etc., Etc.. It should look like this if you're done. (Except the color part, that determines what colors you chose.)
STEP 2: The Attachment.
General Smartypants has been getting a little impatient so lets rock. First off, in the "War3 Model Editor", Hit "Windows". Next Hit "Material Editor". Then "Texture Editor". Now in the "Texture Editor", right click it and then hit "Import". Then find where you saved "Main Parts Of A Unit". Import it. Now get the "Material Manager" out. Double click "01D60690". It should show 1 thing in a list. Double click that one thing and then look around. You should see something that says "Gutz". File through that list to replace it with "Main Parts Of A Unit". Then hit "OK". Then hit "OK" again. Er... well looks like we made a mistake, we only changed his skeleton. Lets fix that up. Do everything again and place "Gutz" back in. Thats better. This time hit "01DD50E8". Change that to "Main Parts Of A UNit". Oh crud... It looks like his body can't be edited. It just changes invisible whenever we try skinning him, one of the many problems that occur. Other problems may include but are not limited to 1) Unchangeble black. 2) Invisible body parts. 3) parts in wrong places (Fixible). But I have a solution. Go to the "MPQ Browser" and find "Marine" in the "Critters" section. Now lets change him into General Smartypants. Make his head 3 times bigger, make his gun 1.5 times bigger, Translate hit head up 20 to make it look attached. There. General Smartypants again. Should look like this.
Translate parts sticking out that you may have taken out if necassary. Now he looks good. But he still wants gold armor. So lets rock. First of all, go to www.Google.com and find a good picture of "Gold". A good example of gold is this.
Place this (or a better picture of gold you found) onto "Paint". Make it big so that way it seems good to use. Now lets wrap General Smartypants with the "Main Parts Of A Unit" skin. Use it on the material (Things in material manager) That has 2 on its list. Now on the one that doesn't say "Replaceable ID 1" (Which btw, is the color of the player controlling it) and replace it with "Main Parts Of A Unit". Colorful armor but not what we're aiming for. But it's the start of how I skin. Now have both of those paints ready. One that has the gold picture on it, the other with "Main Parts Of A Unit" on it. Now as you can see, the armor are all the colors on "Main Parts Of A Unit". So take out a chunk of gold like this. Use this tool
to make a square around the part that looks like gold and ONLY around the part that looks like gold. Try getting a mix of light gold and dark gold to give it that gold effect. If you know how to enlarge it, that would be great. Now right click and copy it. Then paste it on the "Main Parts Of A Unit" page on wherever the colors appear on the armor. If you understood it should look like this. (Also keep in mind, the armor around the legs cannot be changed due to one of those complications i mentioned earlier. Also remember to "Save AS", otherwise it will save it over "Main Parts Of A Unit").
We should have some pretty decent skin now. Now replace the material that has "MAin Parts Of A Unit" with "General Smartypants Skin" (Or whatever you called it). Lookin good general =). Heres a picture of the completed general.
FINAL STEP: CONGRATULATIONS!
Congratulations. you have finished reading this tutorial and now know how to skin my way. Remeber to skin the way YOU feel is right. this is only one way, grabbing stuff from a photo and implementing it into your model. So good luck. (Any comments on this tutorial on what i may have missed or need to add would be appreciated. Also, i will answer all questions to the best of my ability. But i don't know how to import so don't ask questions about importing. And it will only not import if you added an extra skin, editing the body without adding skins will still let you give a 100% import of the model. Also remember "Paint" may not be the best program to skin with so try using the art program you're comfortable with.)


